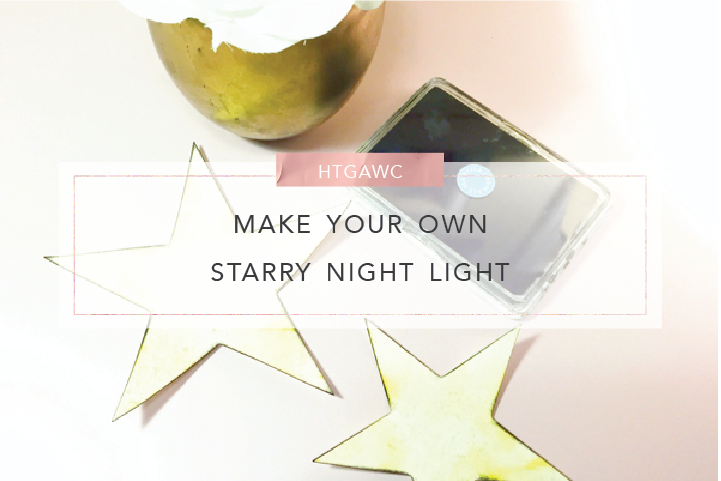
 I’ve been wanting to do something with Westley’s window for awhile now. I really haven’t done much with his nursery since he was born. So tonight I had the chance to change things up a bit. Lately, Wes has really been attached to his little night light. I thought I would kick it up a notch and turn his entire window into a night light — a starry night light if you will. Both Westley and I loved this project and it didn’t take long at all. Now he can reach for the stars anytime he wants.
So let’s get going so your little ones can reach for their own stars too!
Supplies for A Starry Night Light
- 3 pieces of cardstock (you may need more depending on the number and size of your stars)
- Silhouette Cameo machine
- Heidi Swapp Color Shine in Gold
- Heidi Swapp Color Shine in White
- Yellow Ink
- Black Ink
- Baker’s Twine
- Scissors
- Staple Gun (Or strong tape)
- Christmas lights
Steps
Step 1: Open your Silhouette Studio on your computer. Either upload your own star and moon designs or download them from the silhouette design store. Size your stars and moon to the appropriate dimensions for your window.
Step 2: Set your cut settings for cardstock. After adjusting your cut settings on your computer and on your machine, load cardstock and let it cut. I ended up using 3 pieces of cardstock to make 2 large stars, 4 small ones, and a moon.
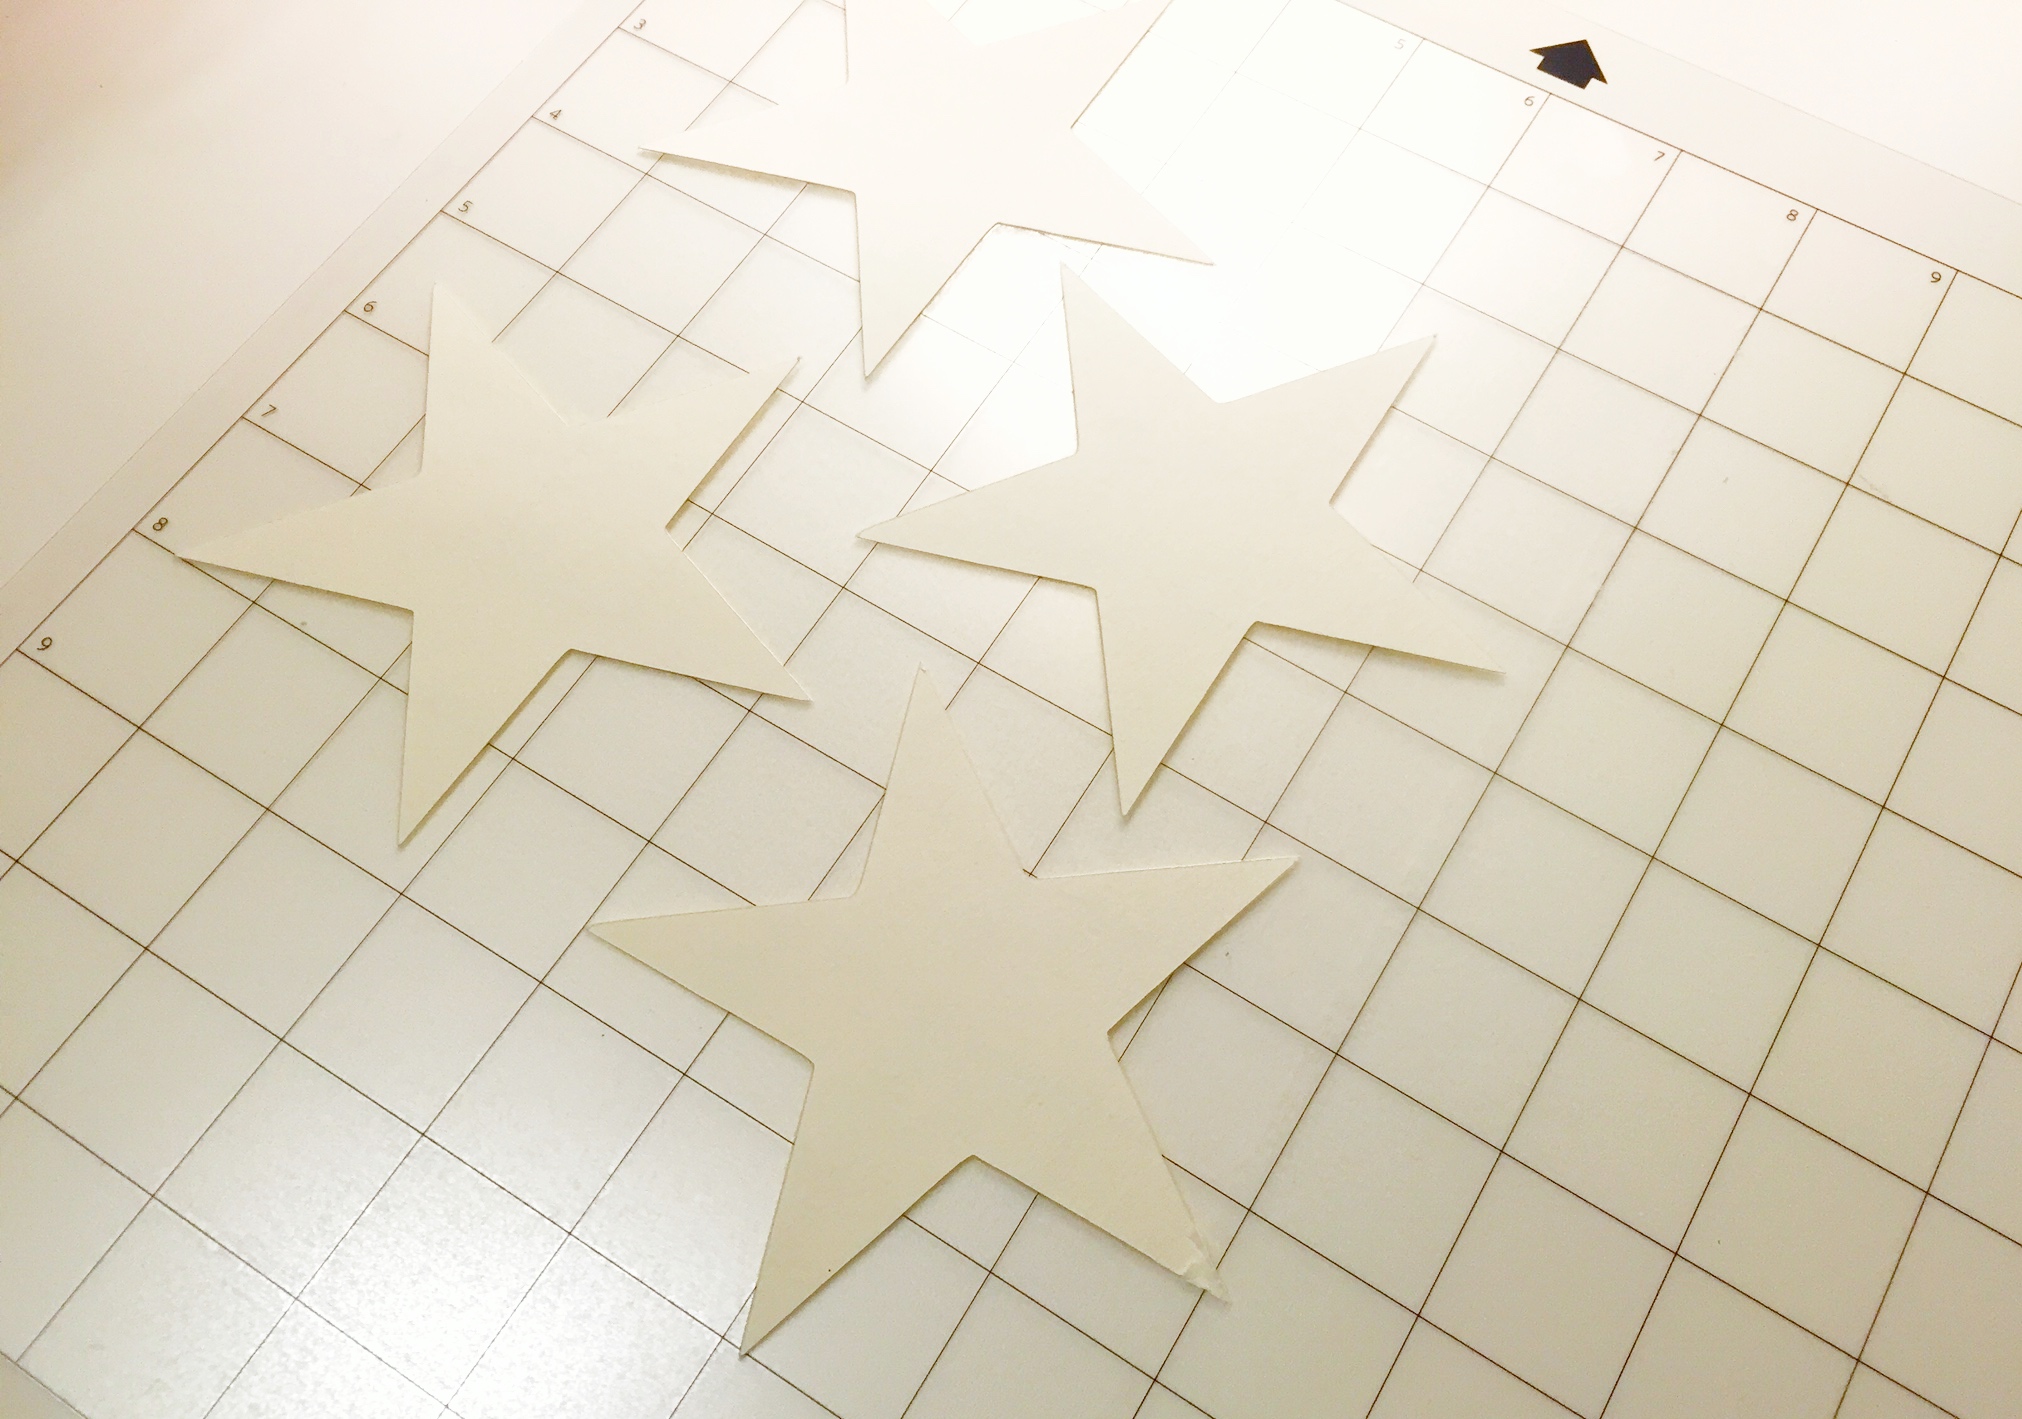
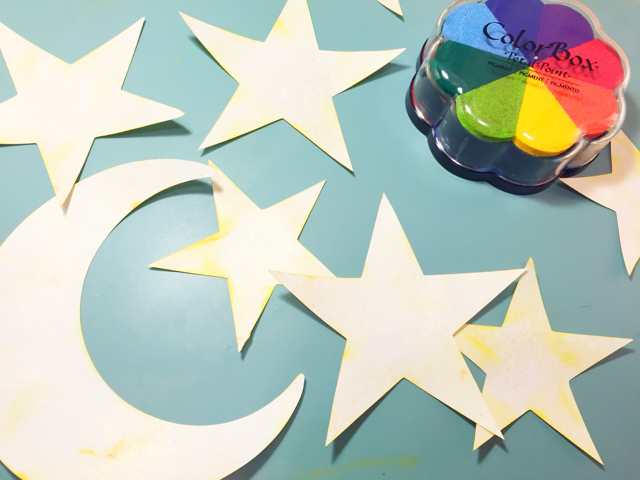
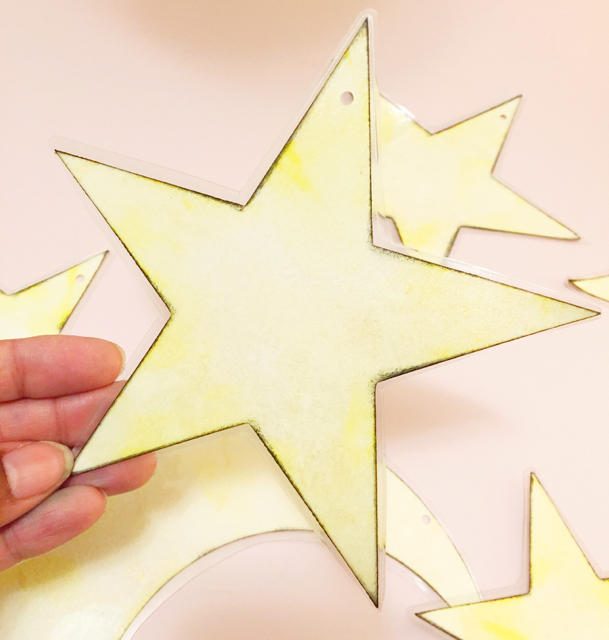
Step 3: Remove your stars and moon. Place them on a covered surface like the Heidi Swapp Silicone Craft Mat. You’ll want to cover your surface because the next step can get a little messy.

Step 4: Grab your Heidi Swapp Color Shine in Gold and White. Spritz your cardstock both colors until you get the combination you like. Then set to the side for a few minutes to dry.

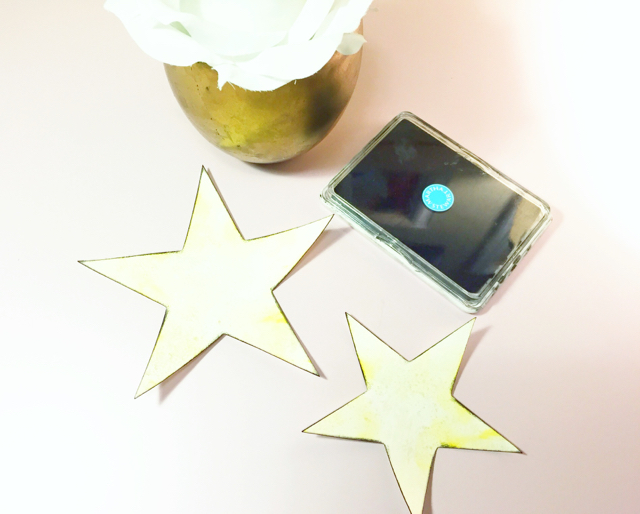
Step 5: Using yellow ink and a swab of some sort, lightly add a bit of the color to the outer edges of your star. You just want a touch of yellow. I used Colorbox Pigment Petal Point’s Yellow.
Step 6: Using a black ink, outline your stars by brushing the edges with the ink pad. You’re trying to outline them to make them POP!
Step 7: Once everything is dry, laminate your stars and moon so they last. I figured the paper may curl due to being in the window so I wanted to protect them.
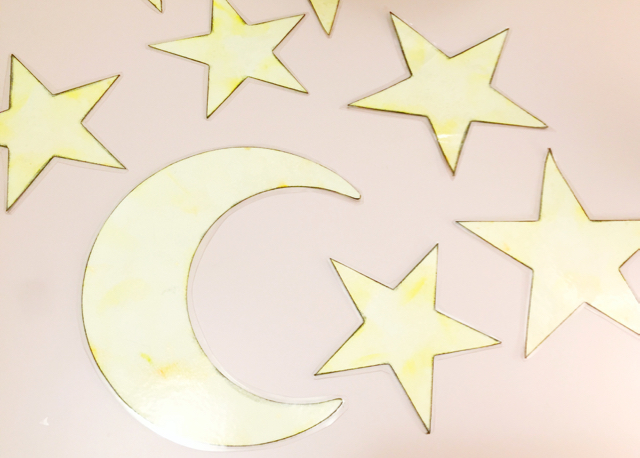
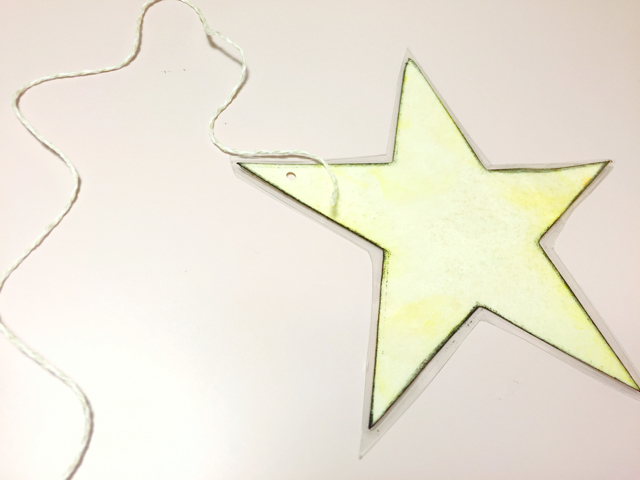
Step 8: Cut out your stars and moon.
Step 9: Punch a hole in the top of your stars and moon. Tie a piece of Baker’s Twine to each shape. I cut the twine at different lengths so I could stagger the stars and the moon.
Step 10: Using a staple gun (or a heavy tape if you’re renter like me) connect your hanging stars and moon to your window. I staggered my stars and moon on both levels of the window.
Then add your light chain around the window. I only had blue lights, but I think it worked out well. His favorite night light is blue so I think Westley will be okay.
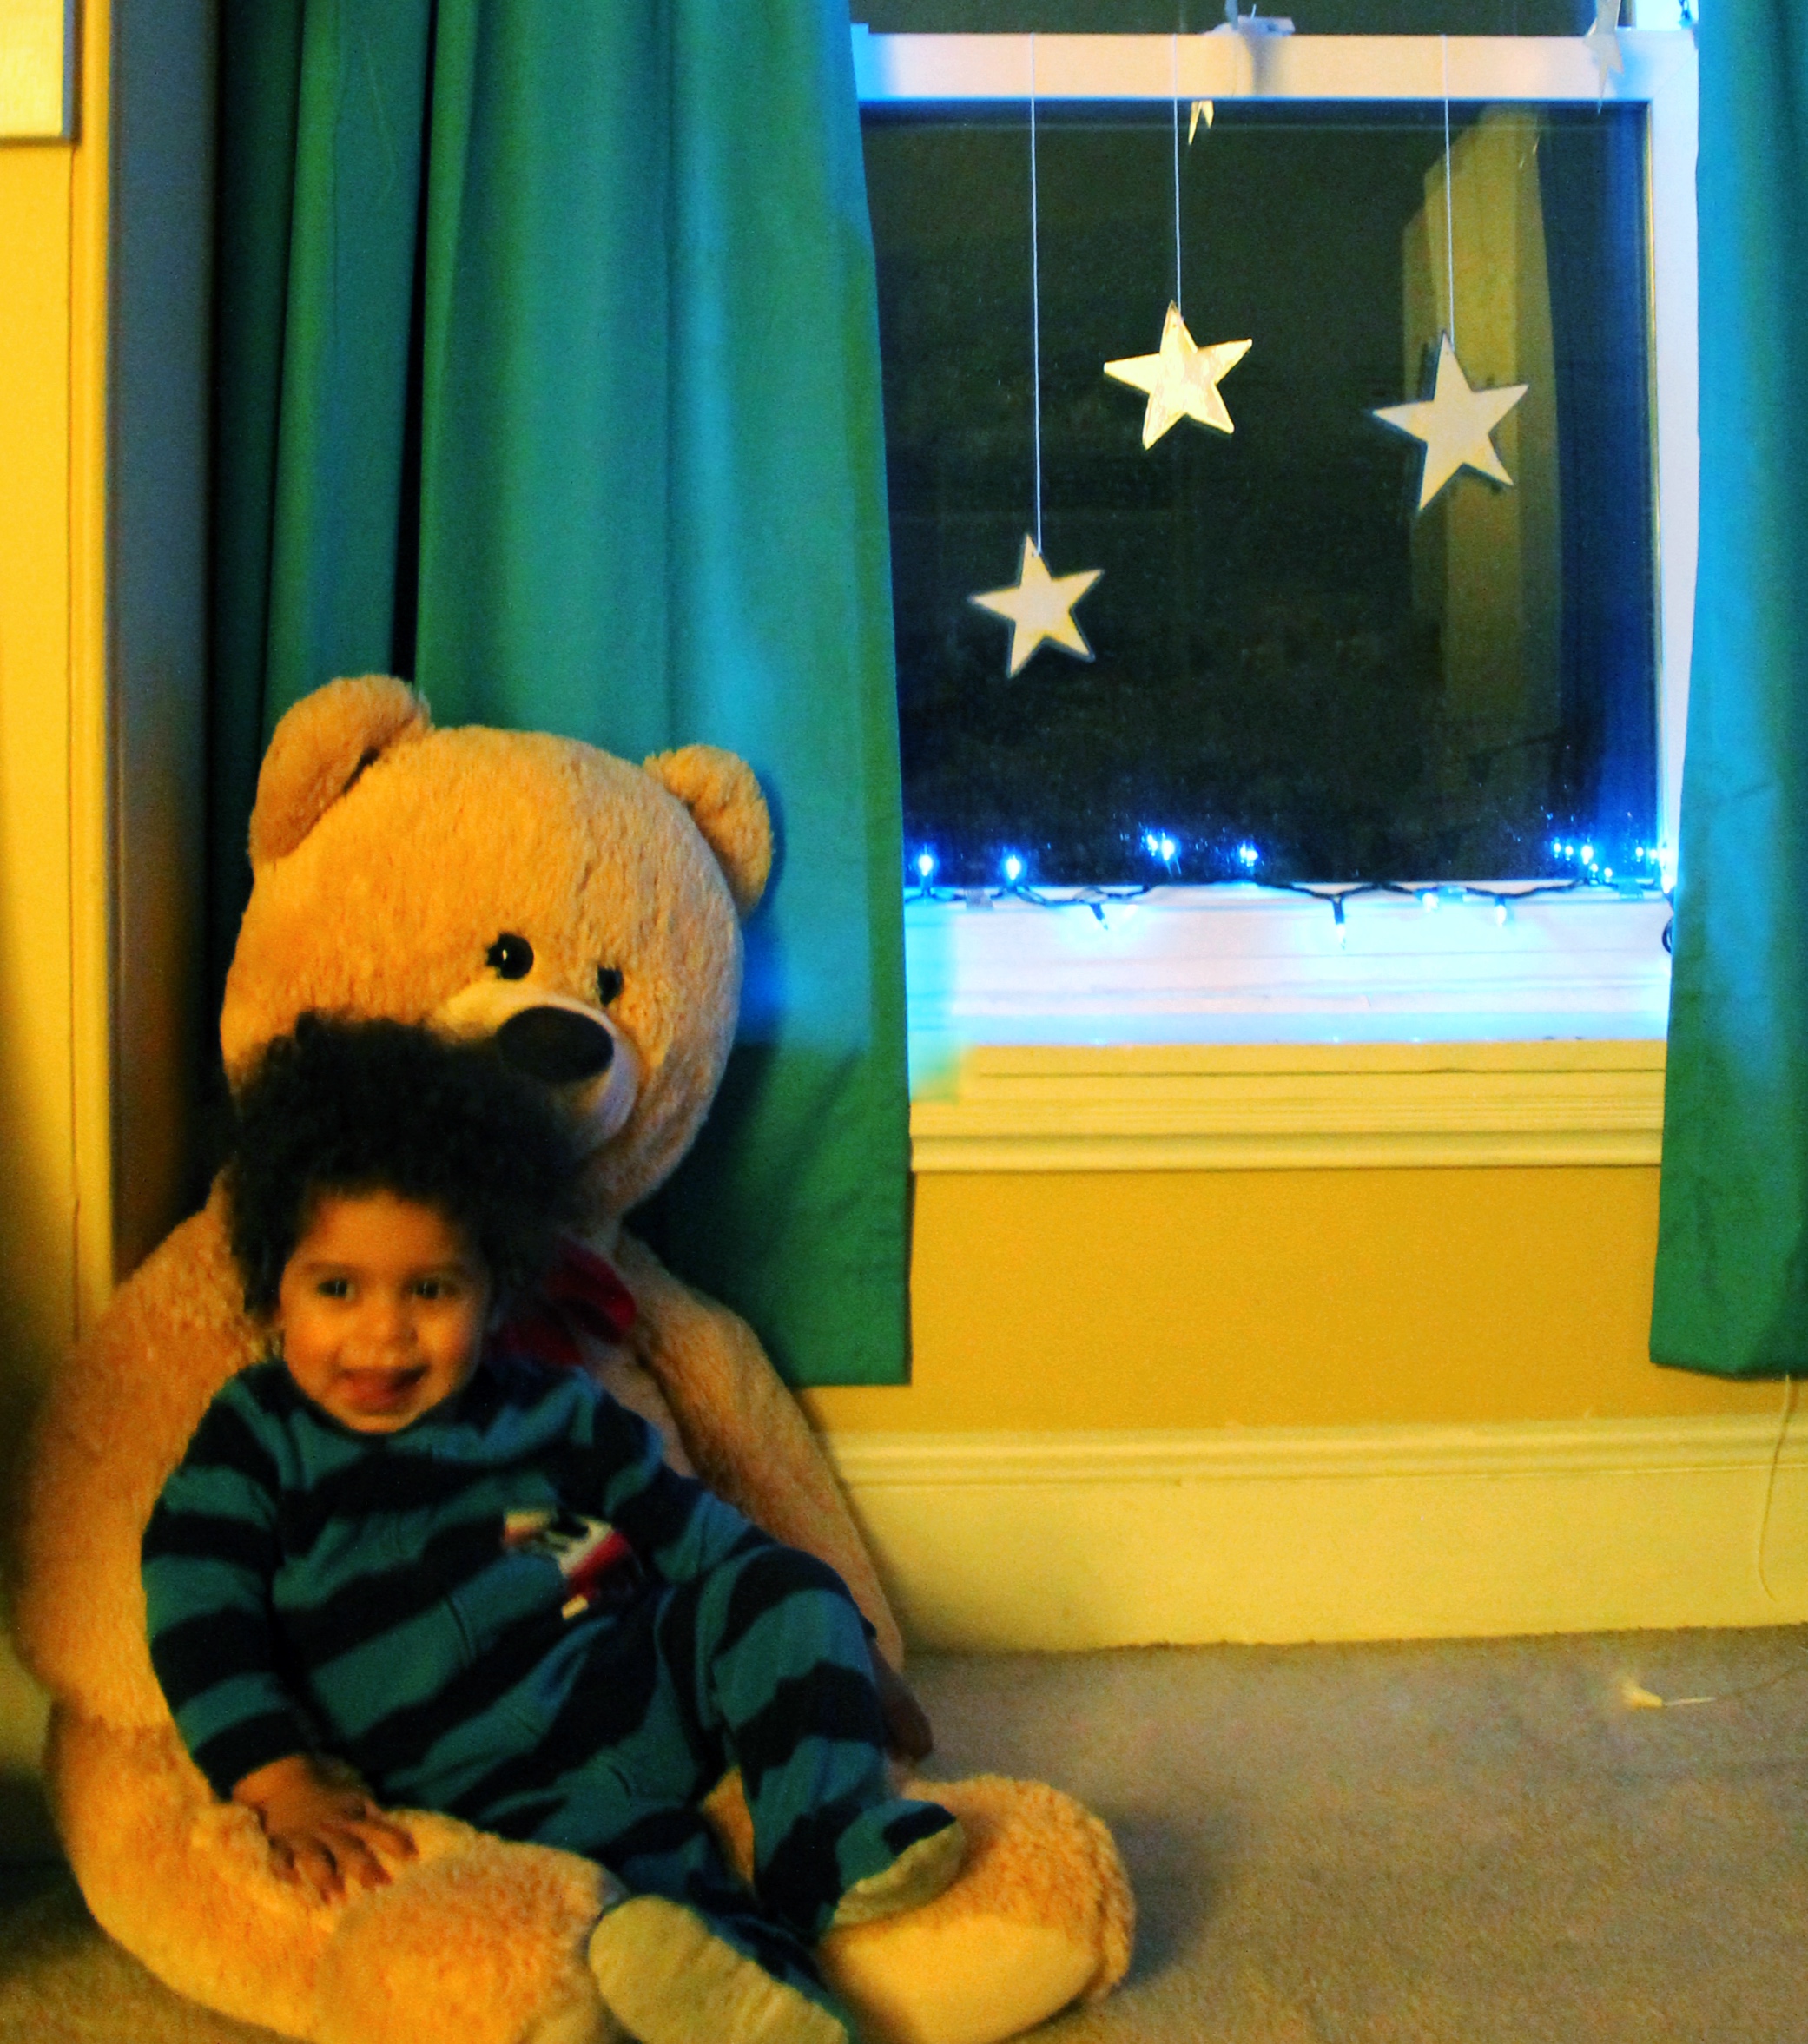
So how did your starry DIY night light turn out? Westley loved his new window. He went straight to his stars and started to play with them. He also seemed pretty peaceful when my husband and I put him to bed. The only thing is we have to tiptoe into his room after he falls asleep to unplug the lights. Perhaps we’ll get a time when his little sister gets here. Show me how your windows turned out by posting to Facebook, Instagram or Twitter with #htgawcrafting. Can’t wait to see what you created.