This post may contain affiliate links. That means if you click on some of the product links, I may receive commissions for purchases made through them, but at no cost to you.
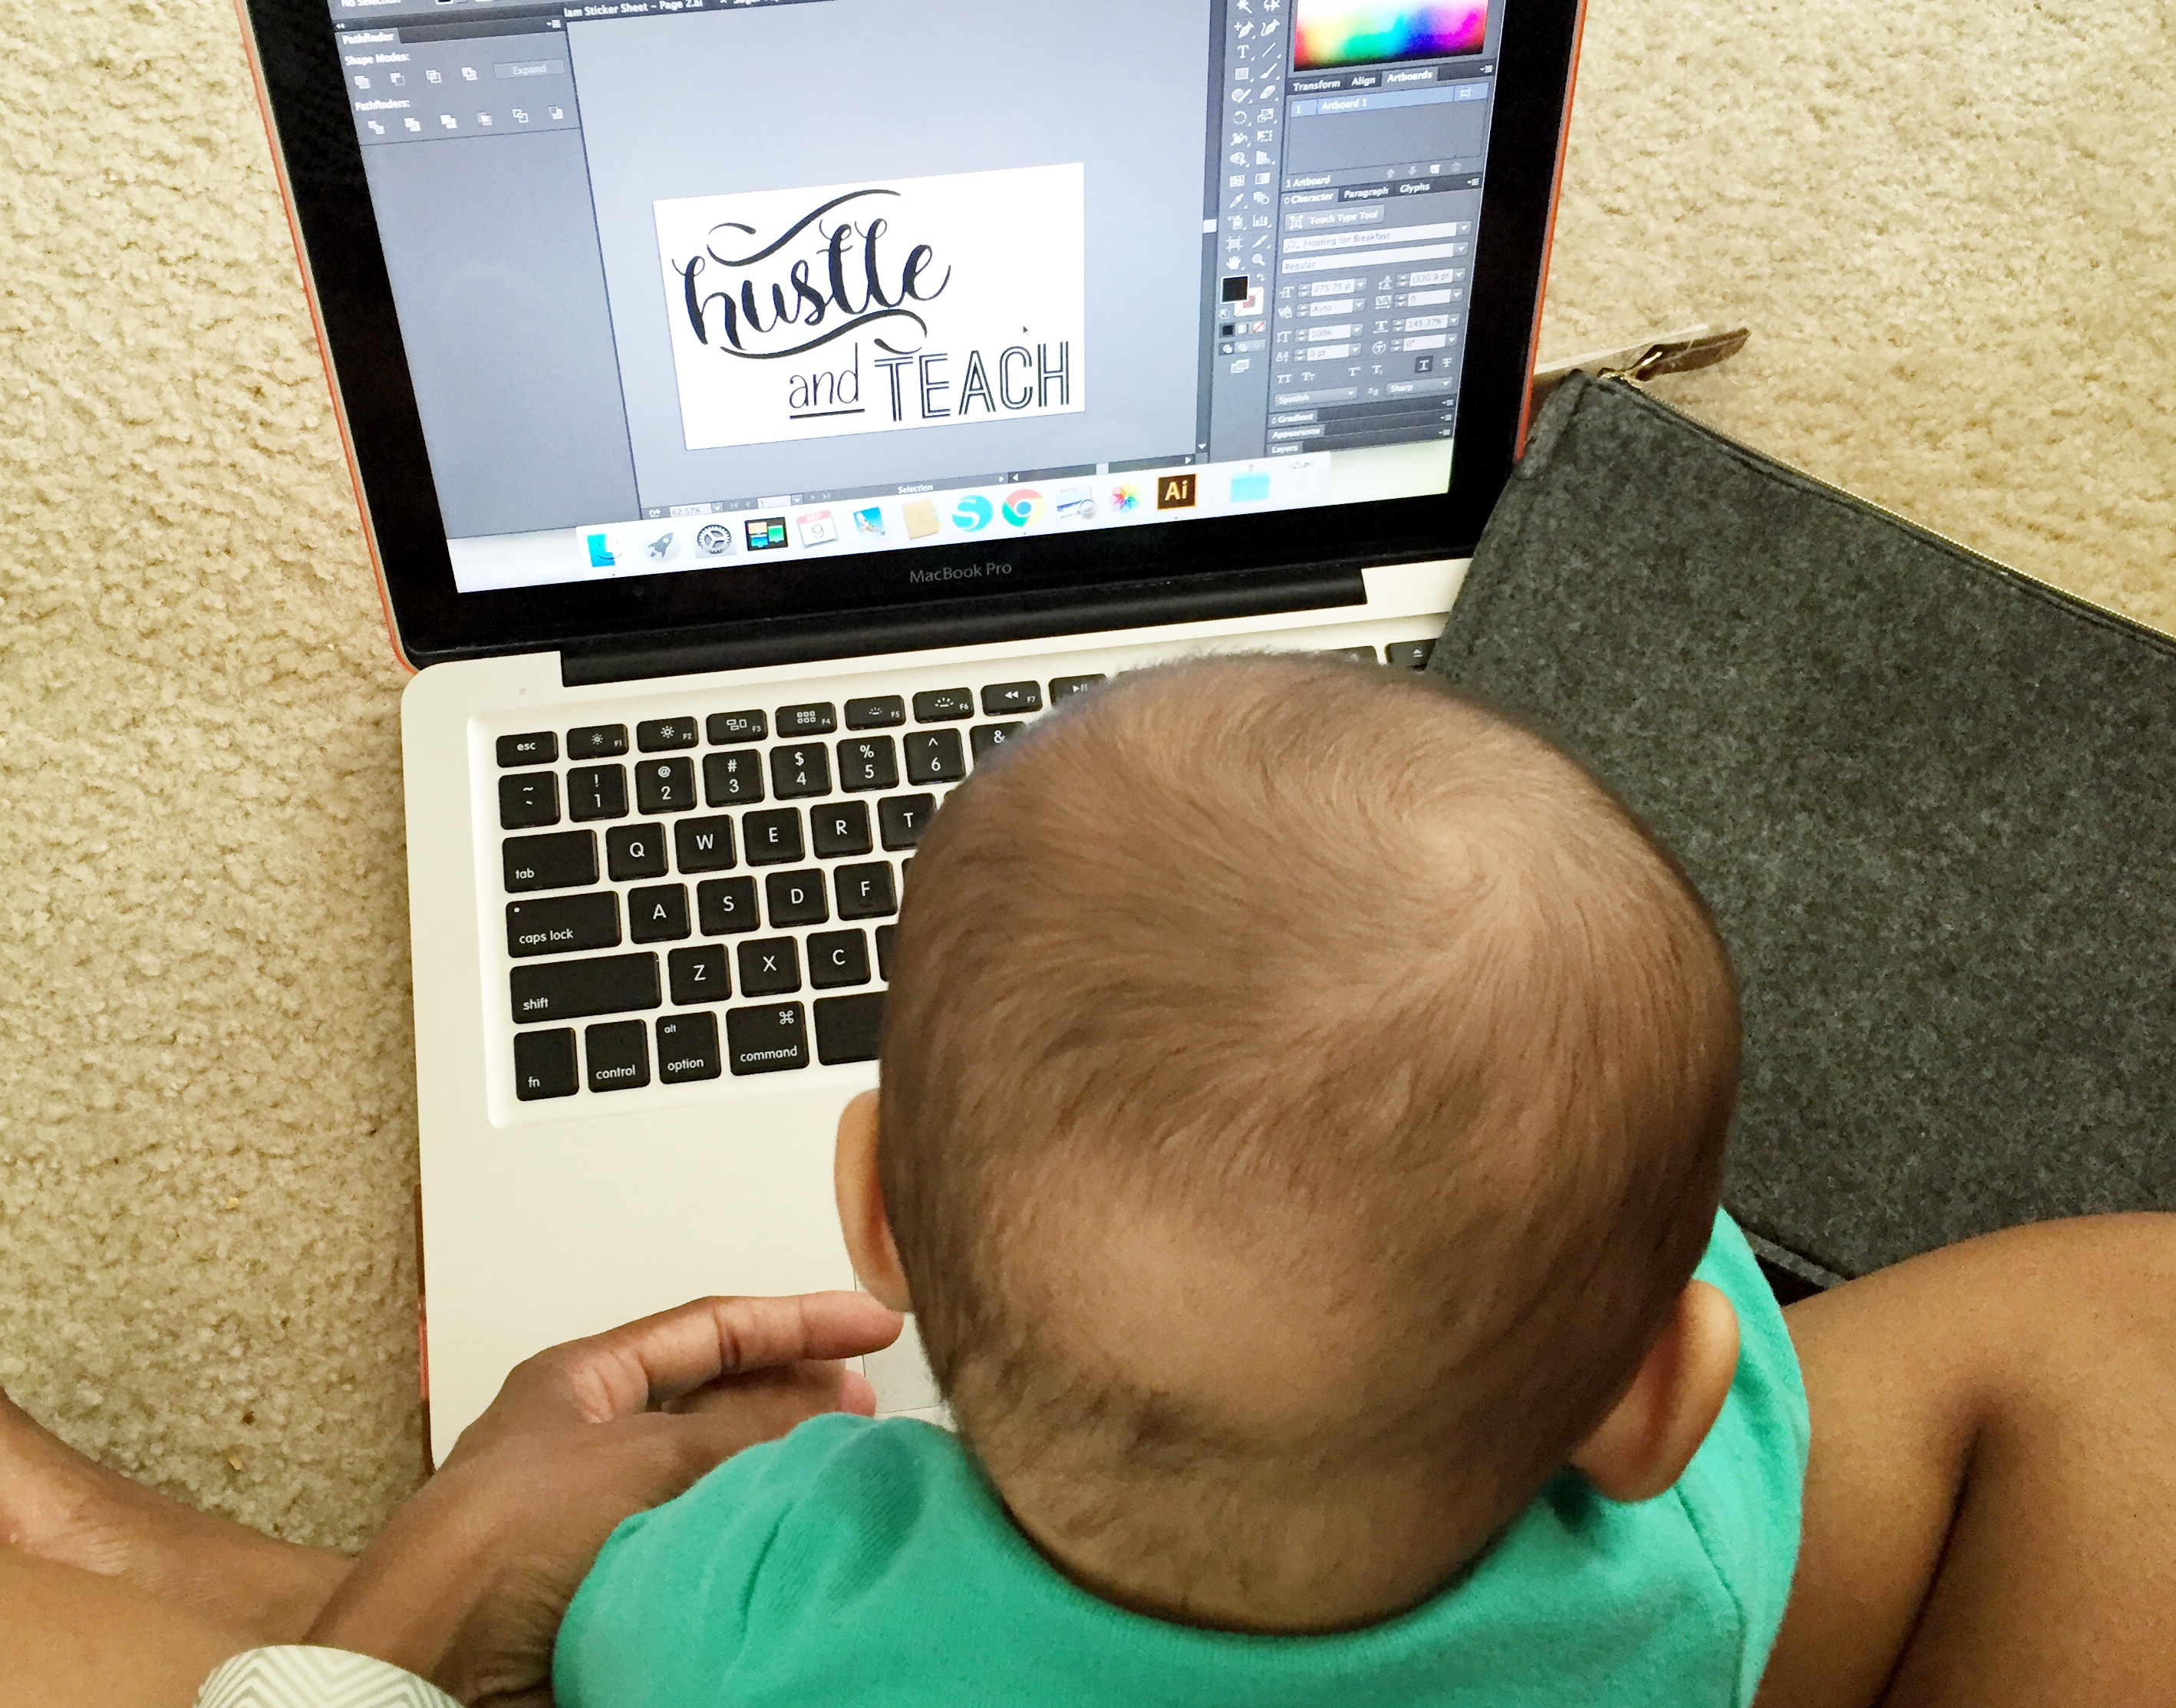
I’m super proud of my sister. She just got a job teaching middle school kids this fall in Philly. She’s going to be fabulous and a fabulous teacher like her needs some fabulous school supplies. So I thought I’d whip up something glamtastic for her for this week’s How To Get Away With Crafting challenge – a DIY Foil Clutch.
Inspiration for this project hit me while I was checking out the newest fall goodies in the Target Dollar Spot (an excellent treasure trove of crafting goodies on the cheap). They have these wonderful plain felt clutches for $3.00 that are just dying for a little glam. They’re the perfect size to decorate and will hold a ton of supplies. So go straight to your Target, grab a couple of these clutches (cause you’re going to want to decorate a few of them) and let’s get going on this challenge. I know my munchkin was super eager to get to work.
Supplies for A Glamtastic DIY Foil Clutch
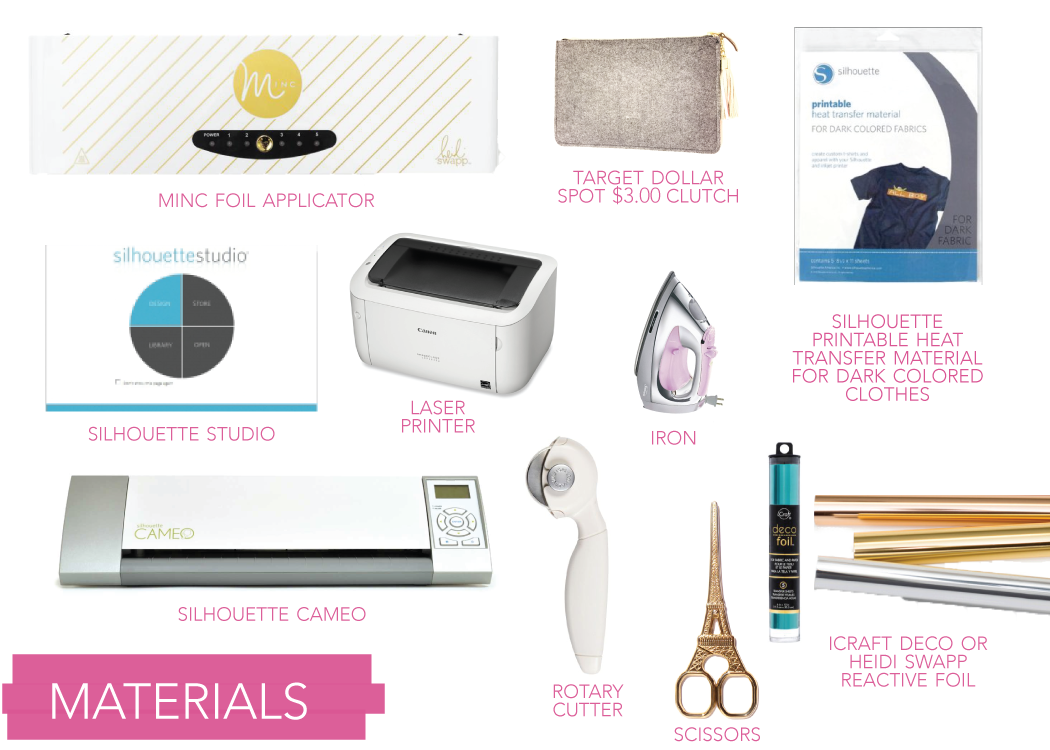
- $3.00 Pouch from Target Dollar Spot
- Silhouette Cameo Machine
- Silhouette Printable Heat Transfer Material For Dark Fabrics
- Laser Printer
- Martha Stewart Rotary Cutter or Scissors
- MINC Foil Applicator
- Foil
- Iron
- Piece of cloth
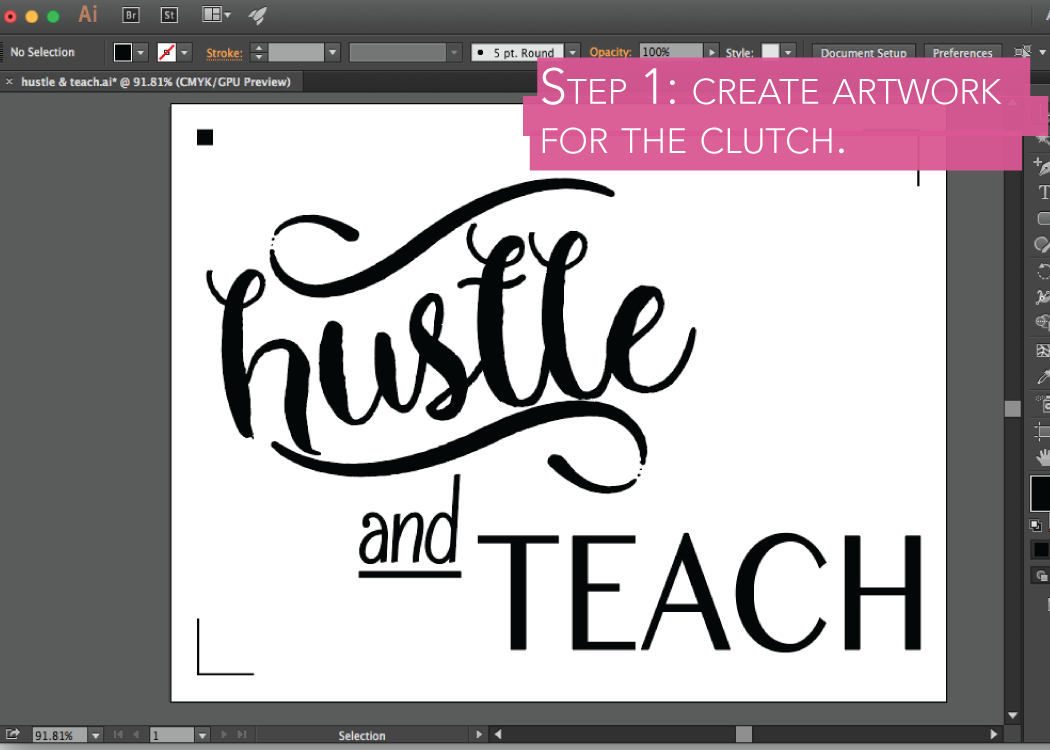
To Prep Your Artwork For Your Clutch
Step 1: Open Silhouette Studio on your computer. Use the text tool to create your expression. (Or in my case, I’ll design in Illustrator and use Silhouette Connect.) Fill your words so they are black. Then size your artwork to be smaller than 10.4 x 6.7 inches and turn on the registration marks.
 Here’s a little tip I use to to avoid spotty foiling on the edge of my words. (You can skip this next part, but I think it helps to improve the foil consistency with thin fonts.) Use the offset tool to create an outline around your words. Then fill in the offset shape with black and make the line a different from color from the one around your actual words.
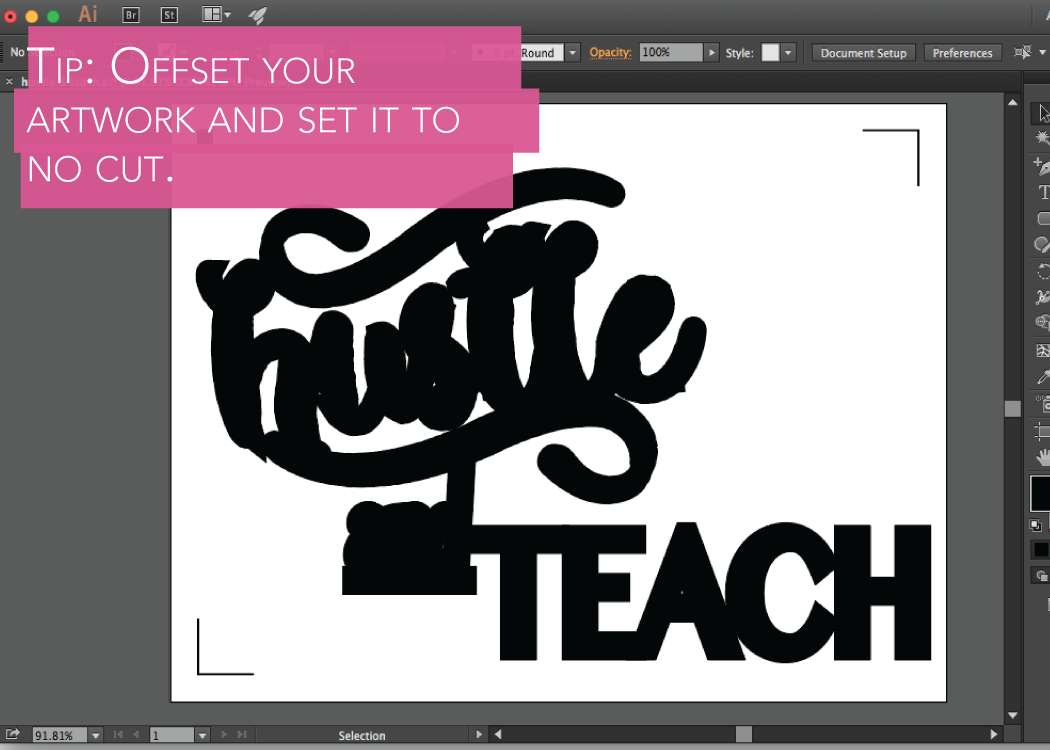
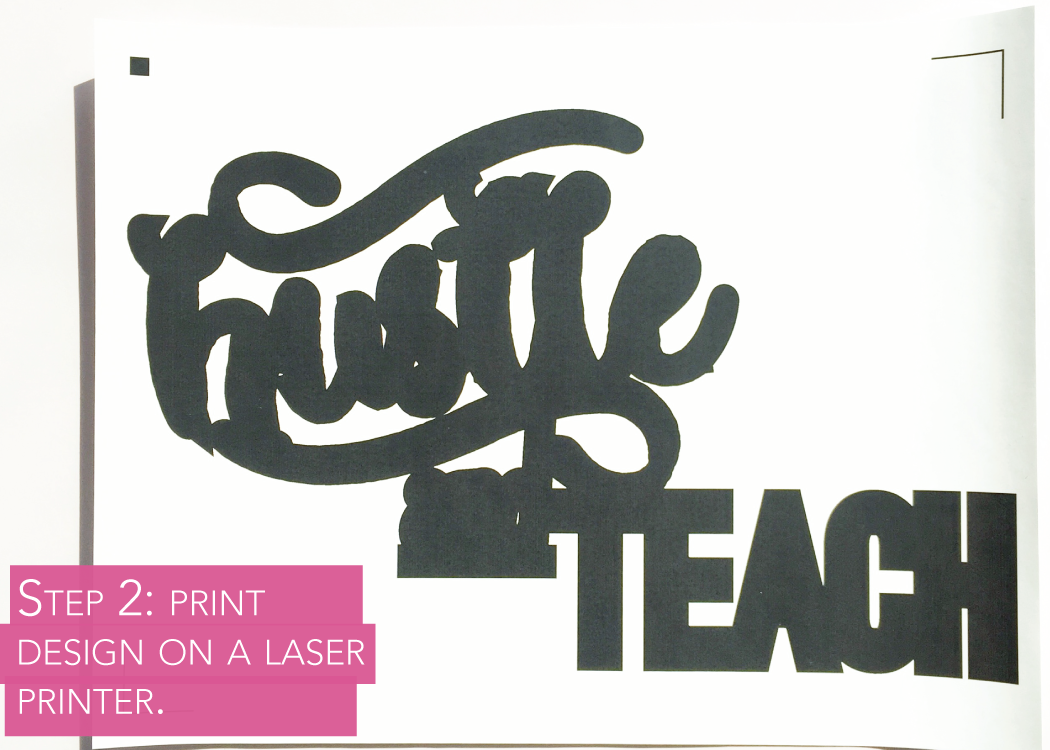
Step 2: Print out your artwork using a laser printer on a piece of Printable Heat Transfer Material (I know the directions say ink jet, but for this project, you’ll need to use a laser printer so the foil reacts to the toner). If you follow my little tip, your print out will look like black bubble letters.
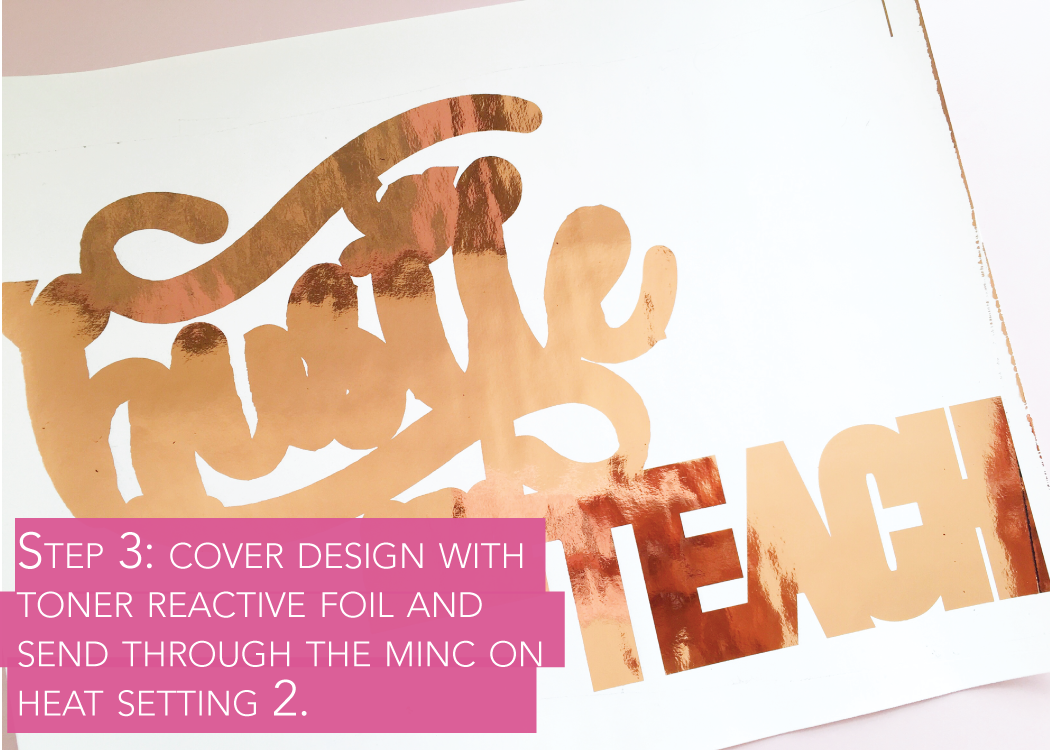
Step 3: Turn on your MINC Foil Applicator and set the heat level to 2. Cover your design with a piece of foil. Place it inside your MINC sleeve and send it through the applicator. Here’s another little tip: The Cameo has a hard time reading foiled artwork, so cut your foil so you don’t cover your registration marks. And to avoid leaving traces of toner on your MINC sleeve, cover the registration marks with a piece of parchment paper and then send your design through the applicator. For more tips on ways to lengthen the life of you MINC sleeve, check out this post.
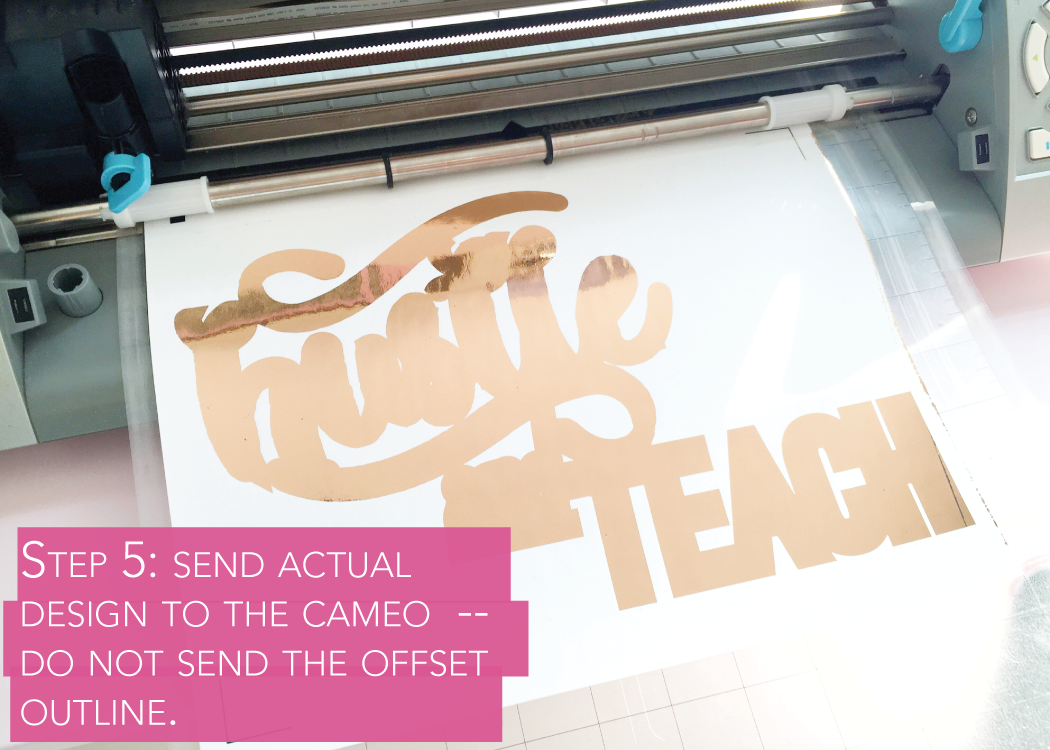
Step 4: Go back to Silhouette Studio. Open your cut settings. Under Advanced Cut Conditions in the Cut settings, DESELECT the offset shape. You want to only cut out your actual words, not the offset. Set your offset to “No Cut.” Set your Material Type to “Printable Heat Transfer Material.”
Step 5: Place your printout on your Silhouette cutting mat. Adjust your blade to 1 and send your design through the Cameo.
To Apply Your MINC Foil Artwork
Step 6: Carefully peel and place your expression onto your clutch. In the photo below how offsetting ensures all of your design will be evenly foiled after cutting it.
 Follow the directions on the back of Silhouette Printable Heat Transfer Material packet to iron on your expression. Once you iron on the design, set it to the side to cool. Here’s another tip, I suggest ironing your design in sections versus all at ones. This way you can make any adjustments to make sure everything is in alignment.

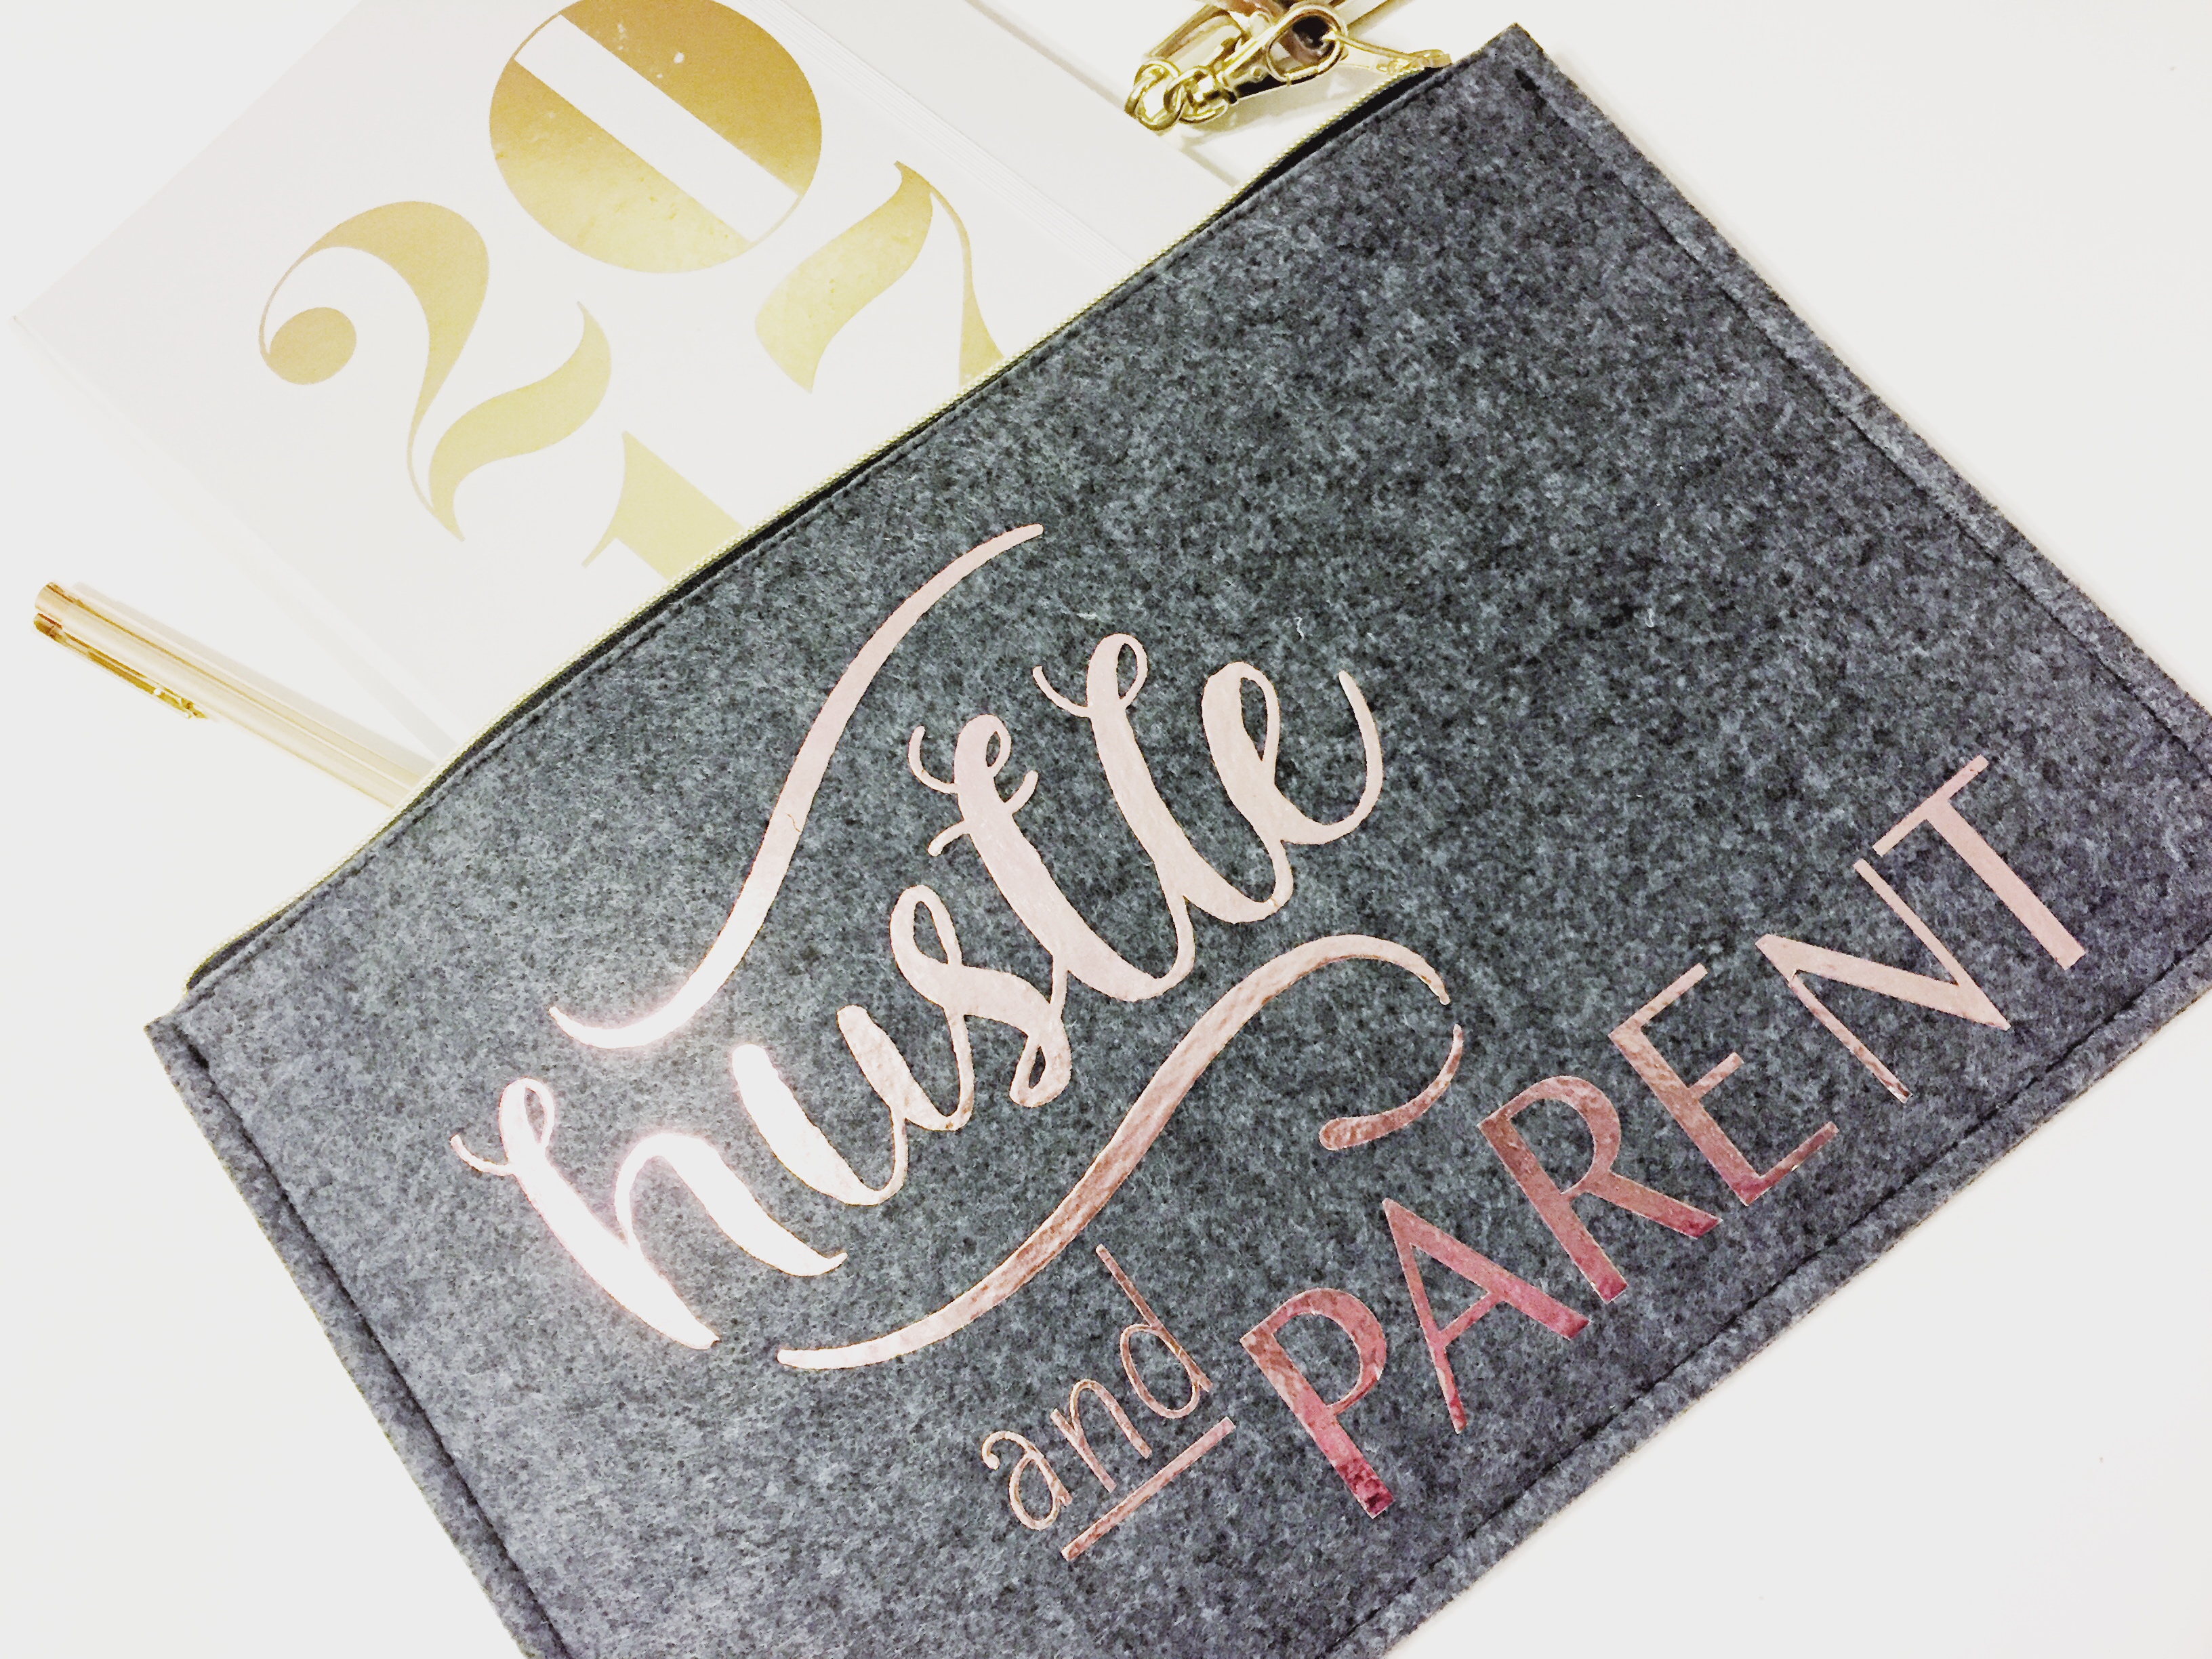
That’s it! Eeeeek! I just love how this project turned out to be so pretty and classy.
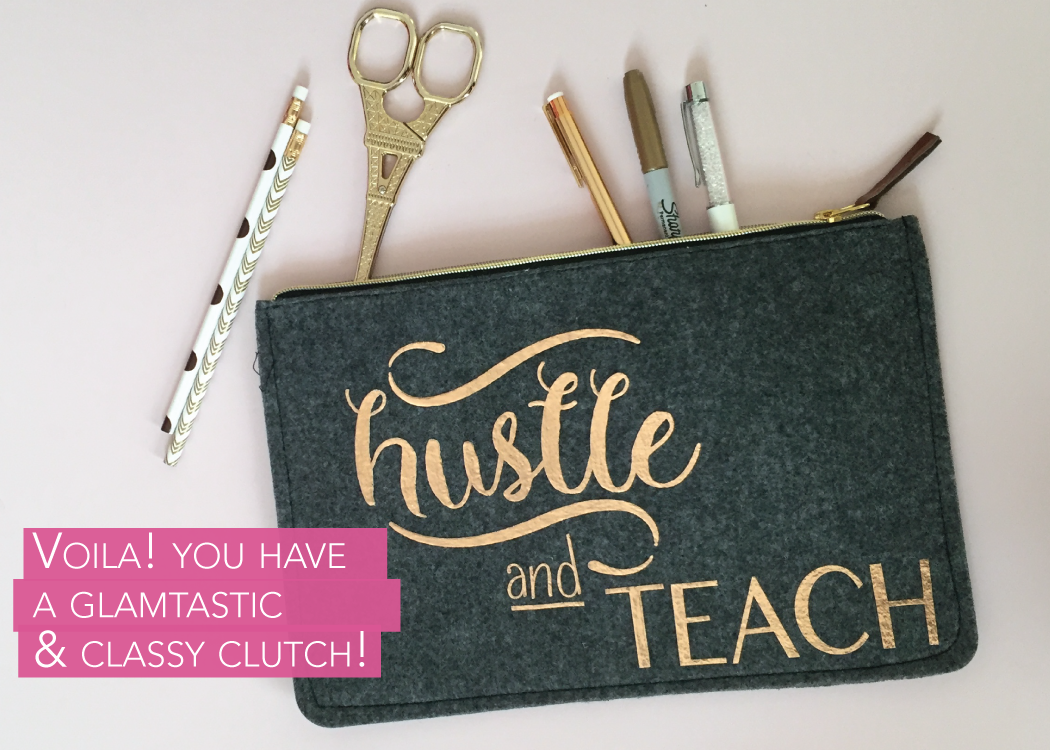 I can’t wait to surprise my sissy with it. I won’t lie, I had to make one of these for me, too. I’ve been using it to hold my planner and planning supplies in my diaper bag.
Now tell me how your DIY Foil clutch turned out? Post your pics to Facebook, Instagram or Twitter with #htgawcrafting and let me know how fab you felt when you were done! Happy crafting!