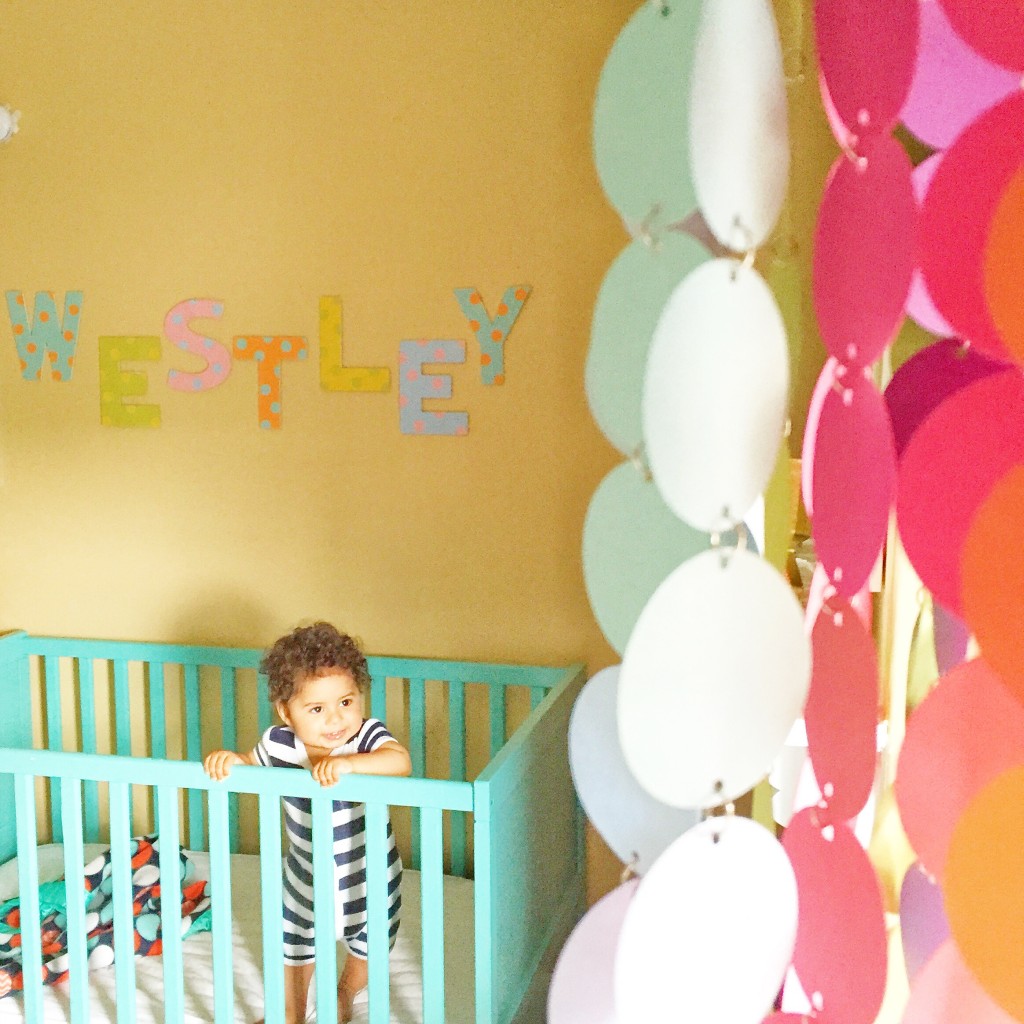
Okay, so being that I’m at 32 weeks I wanted to get things ready for Baby Girl Finch. This month and next month, the htgawcrafting challenge will mostly be dedicated to awesome nursery DIYs. This one was inspired by two projects I’ve done previously. When I was designing my son’s room, I knew I wanted to make a black & white mobile for him. I remembered reading that newborns can’t really see color initially, but the contrasting colors of black and white can be wonderful for stimulating their brains. If you want more details on this, check out this post from HuggaMind.com. Eventually, I found this great DIY tutorial for a black and white mobile from The Not So Secret Musings of a Mum. Westley really liked his mobile, but eventually, he was ready for something a bit more colorful. That’s when I made a rainbow circle mobile for him. He still loves this at almost 16 months.
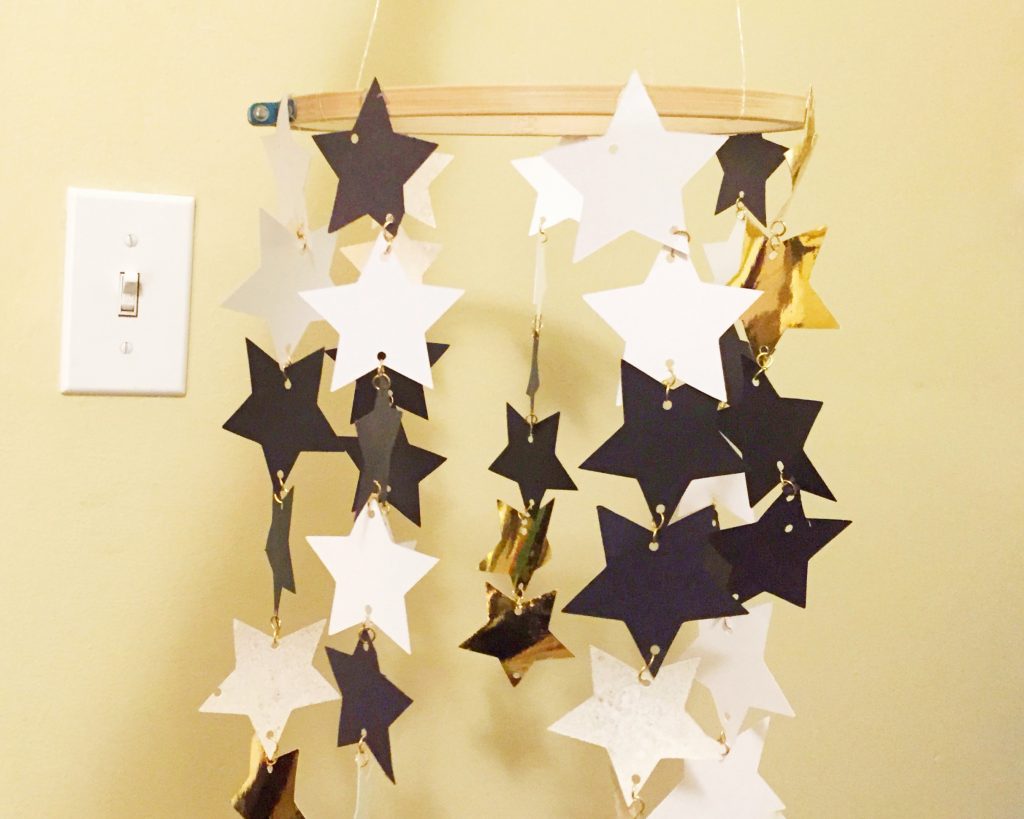
Being a sibling, I know the whole “hand me down” thing can be a annoying for the younger one. I’m the oldest, but I recall the occasional complaints from my sister. I’m determined to avoid this issue when possible with my own little ones. So that’s why I want to make her OWN black and white mobile, but with the rainbow circle twist. I combined the concept of the high contrast mobile with the aesthetics and structure of the rainbow mobile. I love how this turned out. Ready to see how? Let’s go.
Supplies for A Celestial Black & White Mobile
- 2pieces of black cardstock
- 2pieces of white cardstock
- Silhouette Cameo machine
- Heidi Swapp Reactive Foil in gold
- 1 piece of MINC toner sheet
- Crop-A-Dile Eyelet and Snap Punch
- Bamboo Hoop
- Hot Glue Gun
- Jumper Rings
- 2 Sets of Needle Nose Pliers
- Nylon coated jewelry wire
- Ceiling Hook
Steps
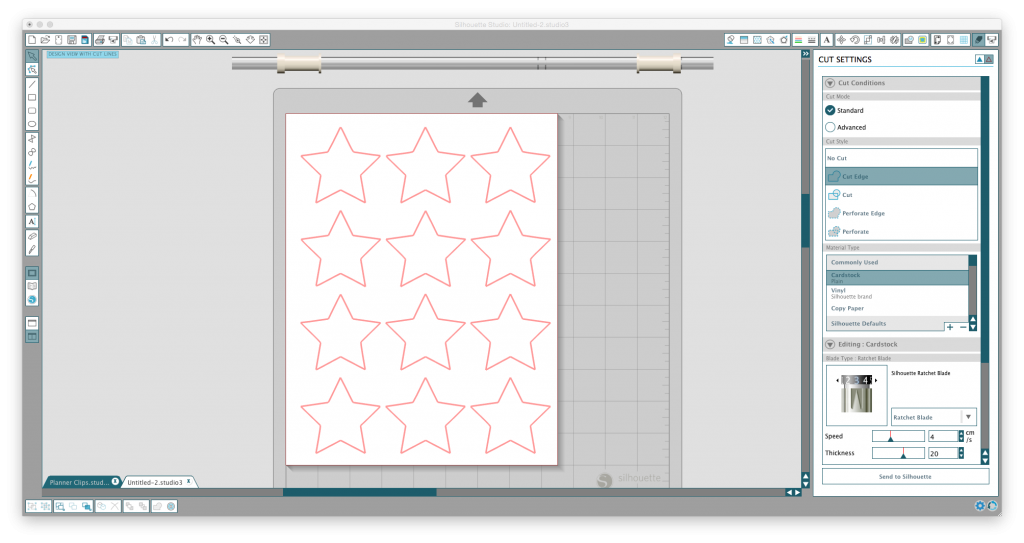
Step 1: Open your Silhouette Studio on your computer. Either upload your own star design or download them from the silhouette design store. Size your stars to 2.5″ x 2.4″.
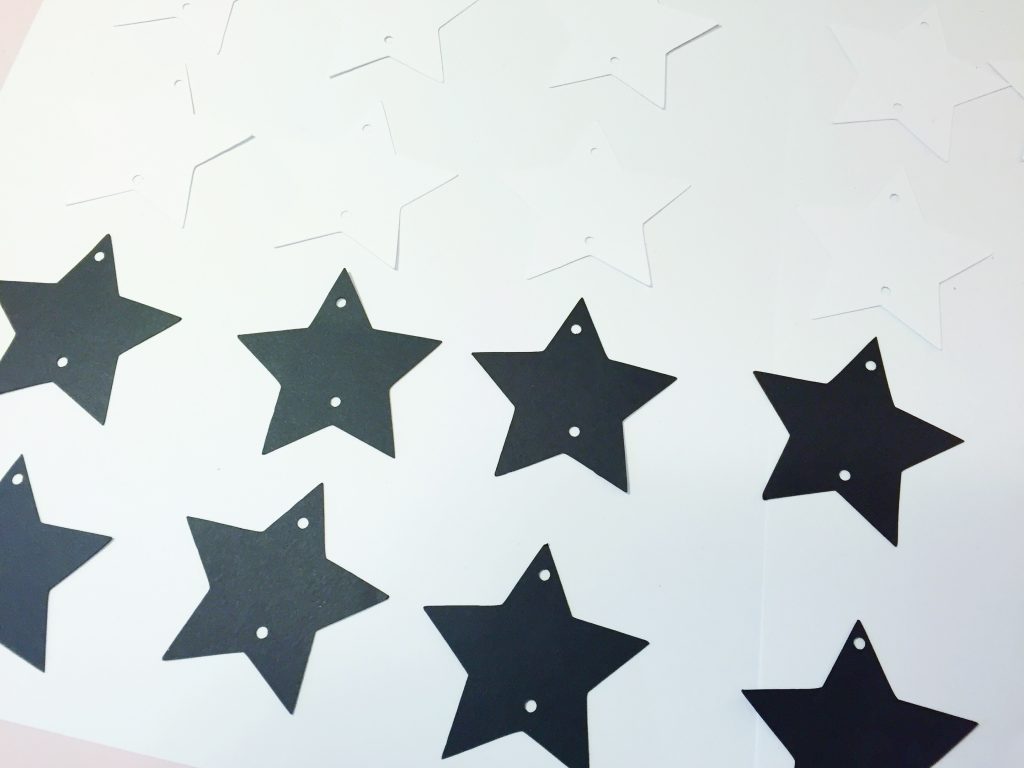
Step 2: Set your cut settings for cardstock. After adjusting your cut settings on your computer and on your machine, load black cardstock and cut 1 sheet of stars. Repeat for a 2nd sheet. Then load your white cardstock and cut 1 sheet of stars. Repeat for a 2nd sheet. (You’ll probably have extra stars, but that’s okay. You may make a mistake or two and need the extras. I did.)
Step 3; Take your Heidi Swapp MINC foil in gold and your Heidi Swapp MINC toner sheets. I used the 8″ x 10″ toner sheets. Send your sheets through your MINC Foil Applicator. Once you have your pretty, foiled sheets, set one on your Silhouette mat.
Step 4: Set your cut settings for chipboard. After adjusting your cut settings on your computer and on your machine, load your toner sheet and cut 1 sheet of stars. Repeat for a 2nd sheet. (If you want to go the extra mile, spray the back of your toner sheets with Heidi Swapp Color Shine in Gold. That’s what I did, so it had a pretty shimmer.)
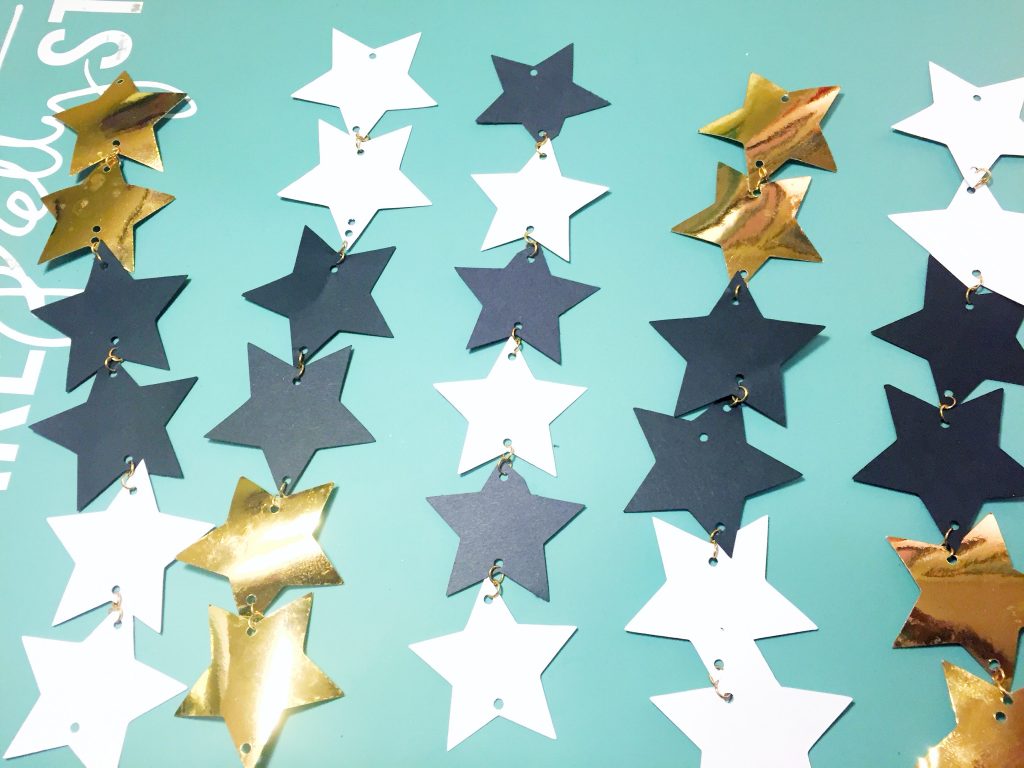
Step 5: Separate your stars into 7 groups of stars. I did several groups of 2 gold, 2 black and 2 white stars and some of the alternating black and white stars. Whatever you like works!
Step 6: Using your Crop-A-Dile, punch tiny holes at the top and bottom of your stars.
Step 7: For each group of stars you will need ten jumper rings. Create 5 mini chains of 2 jumper rings. Attach them to the bottom of 5 stars – your 1st through your fifth. The last star in your chain does not need any jumper rings on the bottom of the star. I used two sets of needle nose pliers to pull the rings apart and to squeeze them shut. With the exception of the first star, which we will attach to the knitting circle at the end, attach each mini chain to the top of a star. You should now have a chain of 6 stars connected by 2 jumper rings each. Do this for each group of stars.
Step 8: Double check that your jumper rings are secure. (Because we’re using little tiny pieces for this project, I recommend not hanging the mobile directly over your little one’s crib. I hung my son’s original mobile over his changing table, which he could see from his crib.) Use your hot glue gun to secure your chains around your bamboo hoops. I measured about 2.4″ inches to fit all 7 chains. If you want to add more star chains, have at it.
Step 9: Cut four pieces of your nylon jewelry wire. The length will depend on how high your ceilings are. Again, be mindful that this is for a baby, so you want your string to be long enough that the mobile will hang nicely, but definitely keep it short enough so your little one can’t reach it and pull it into the crib with him or her. Secure them by threading your wire between the two bamboo hoops and tie it to them. Do this 4 times around your hoops so it will hang evenly. Then gather the pieces at the top and knot them together. Make sure your mobile hangs straight before you make the knot.
Step 10: Secure a hook to your ceiling, similar to what you would use for hanging plants. Then gently loop your mobile around your ceiling hook and watch it sparkle.
That’s it. This one is a bit involved and you may go over the hour time limit for this challenge, but it is worth it. So let me know what you think and how your black & white mobiles turned out. Post your pics on Instagram, Twitter or Facebook with the hashtag #htgawcrafting! Can’t wait to see!
