Is it just me, or does it seem like finding the perfect 1st birthday gift for your little one’s friend is one of the great challenges of being a new mom? Maybe it’s just me. My fear is that I’m going to buy the same gift as someone else. So I try when I can to DIY my gifts for little ones. I’ve done everything from DIY birthday cards to a DIY Memory game. My latest DIY gift was a personal zoo created from a few items at Ikea.
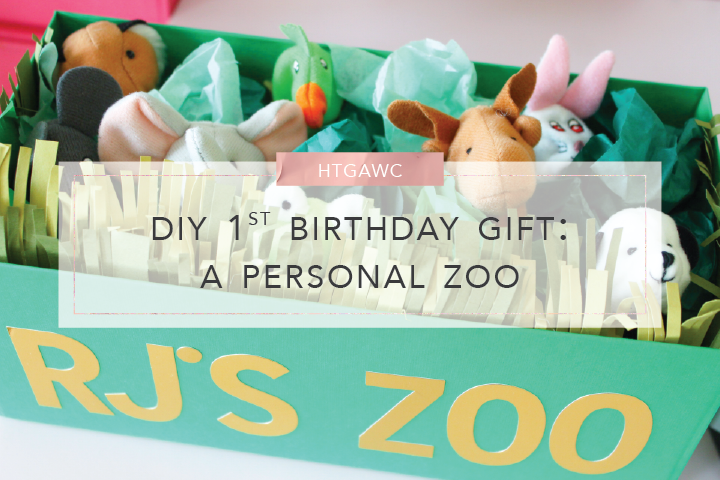
The personal zoo is pretty much finger puppets, tissue paper, some cardstock, and a cardboard box. It’s super simple and super cute.
I really love how this gift turned out. I originally made personal zoos as party favors for my son’s first birthday party. (Check out my post on planning a 1st birthday party for more details.)

They were a hit. So now I give them as gifts. They’re perfect for 1 years olds because you can:
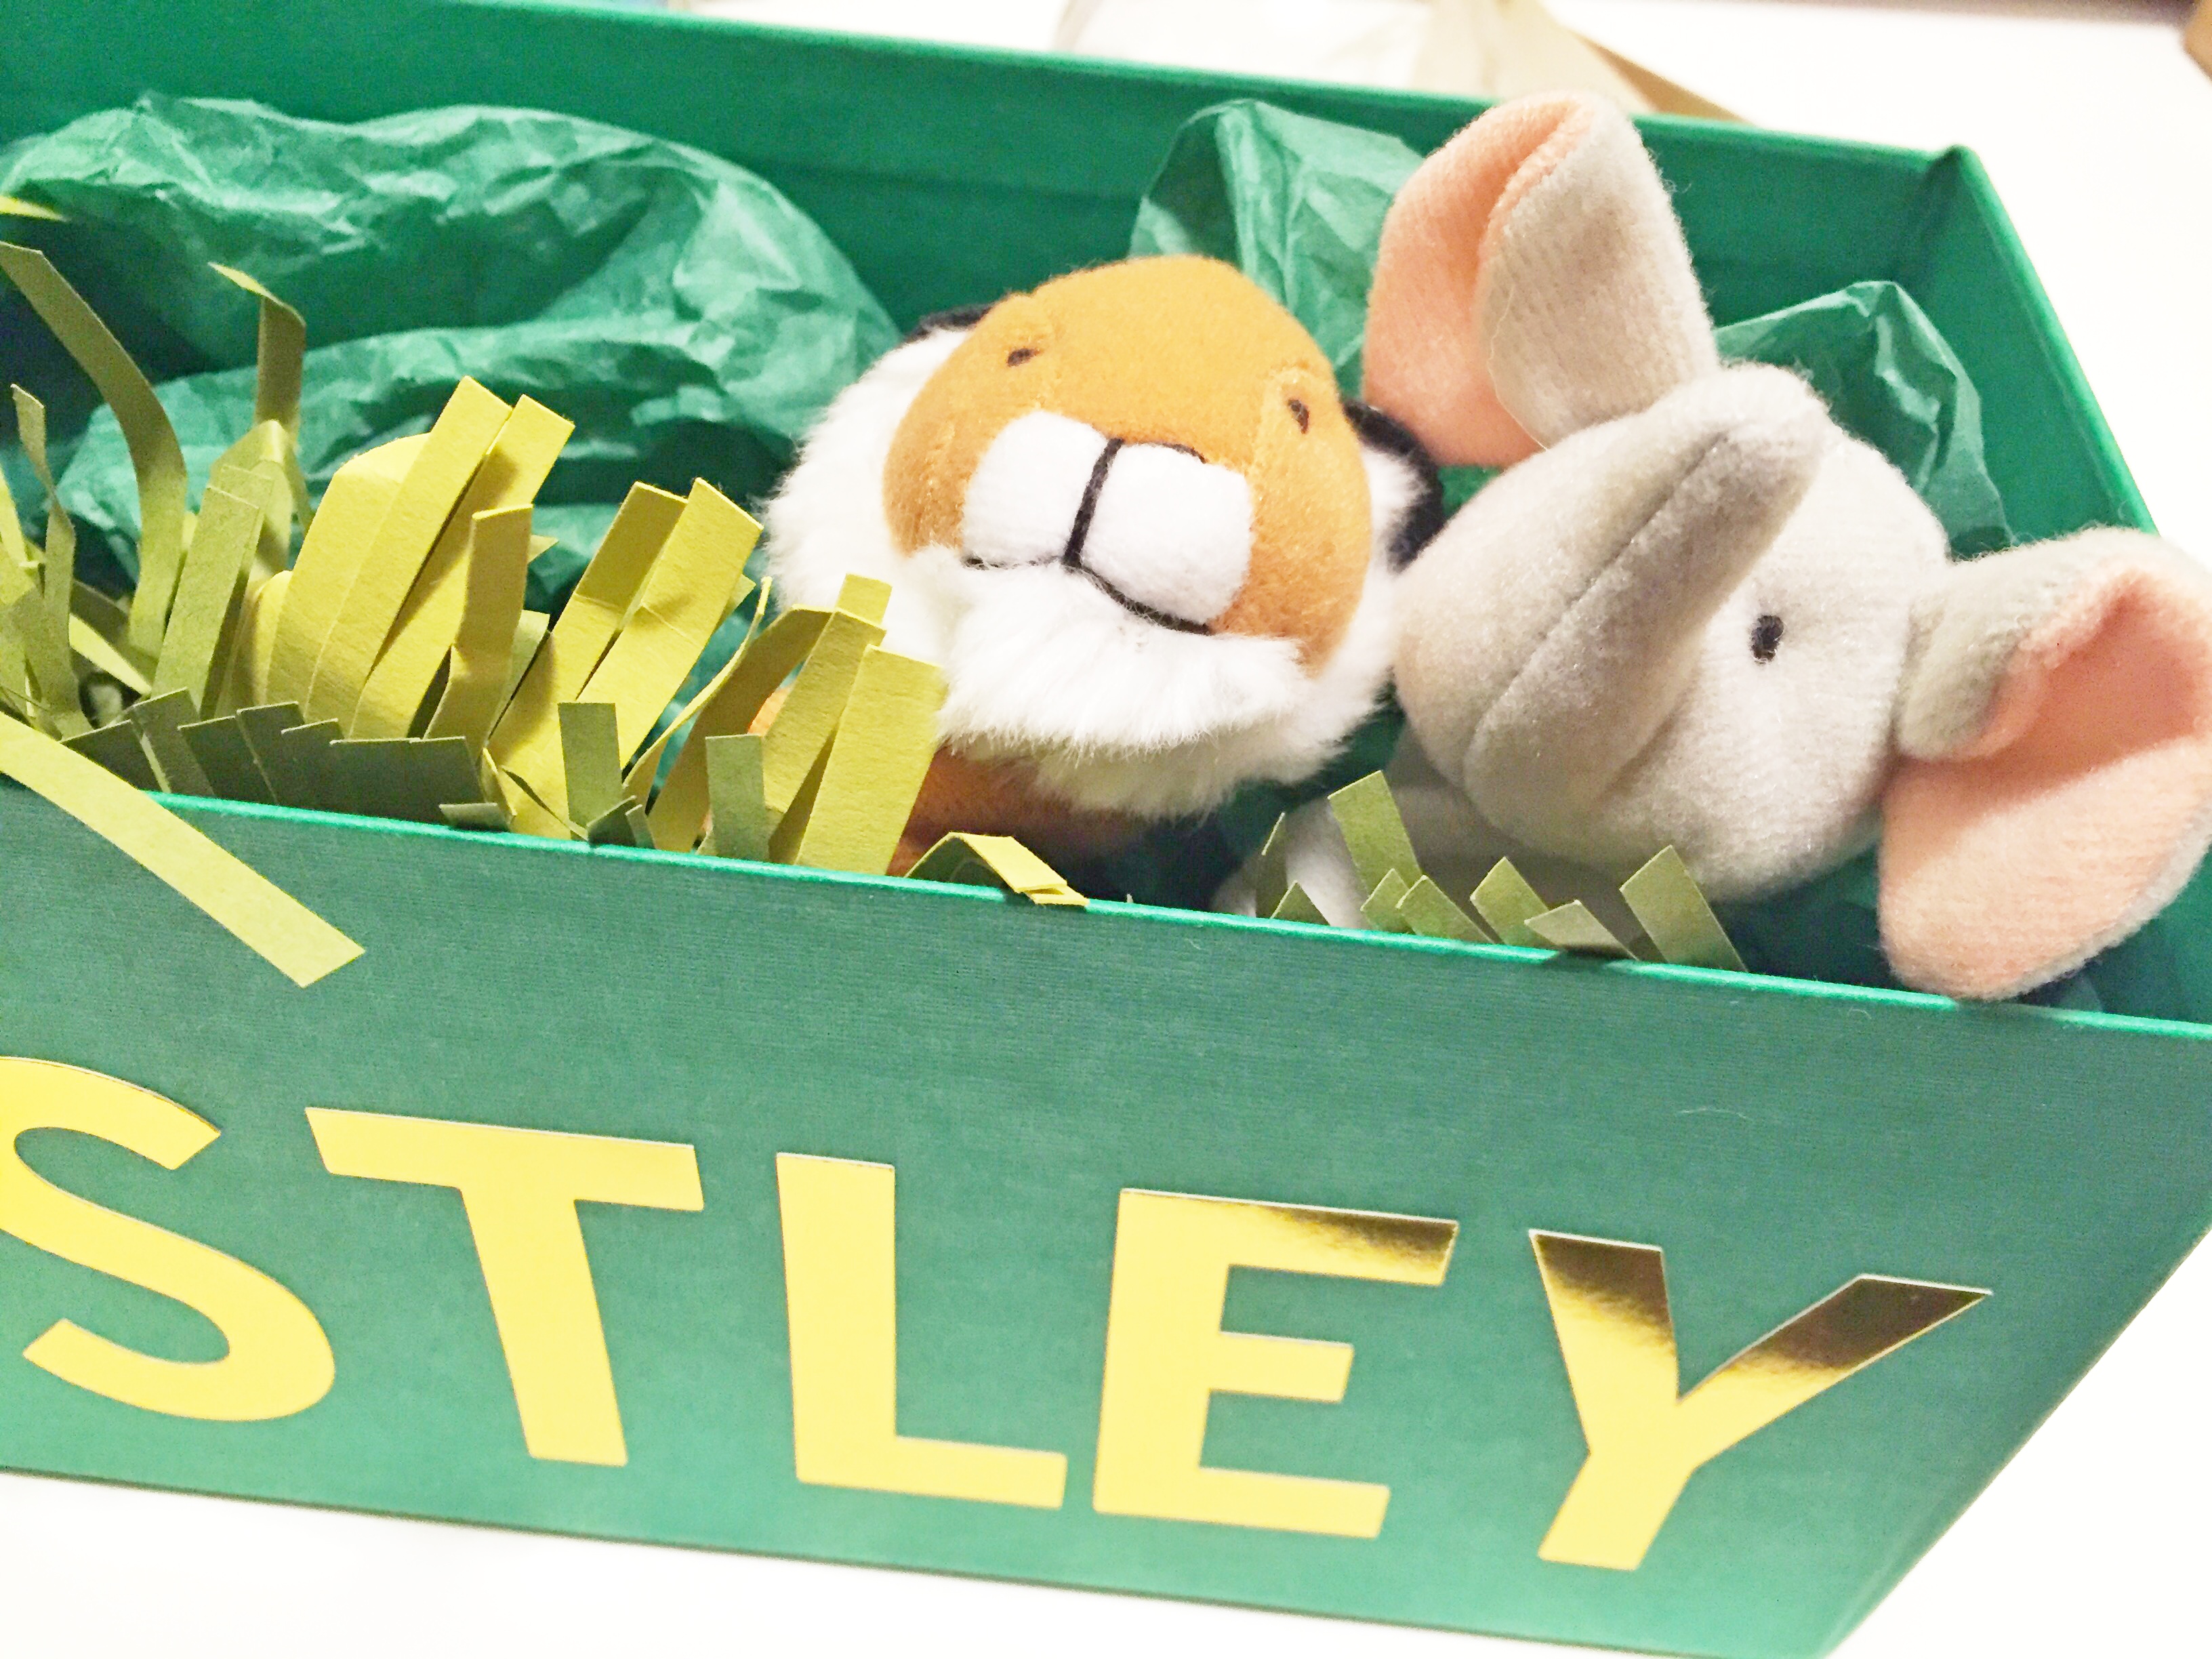
- Entertain and engage them with the finger puppets
- Teach them the names and sounds of different animals (my little guy learned the word “bear” with these puppets)
- Ignite their creativity by letting them play with the puppets (while monitoring them of course.)
So whether you need a unique birthday gift, or just want to make something fun for your one year old, give the tutorial below a try! Lets go!
Supplies for A DIY Birthday Gift – A Personal Zoo
- 1 green IKEA TJENA Box with Lid
- 1 set of IKEA TITTA DJUR Finger Puppets
- 1 Sheet of Chartreuse and 1 sheet of Moss Cover Weight paper
- Martha Stewart Crafts Fringe Scissors
- Martha Stewart Crafts Heavy-Duty Paper Trimmer
- Green tissue paper
- Scrapbook Stickers Gold EK Success
- Hot Glue & Gun
Steps
To Create The Box For Your Personal Zoo
Step 1: Unpackage the TJENA Box with Lid. Follow the directions from Ikea to assemble the box.
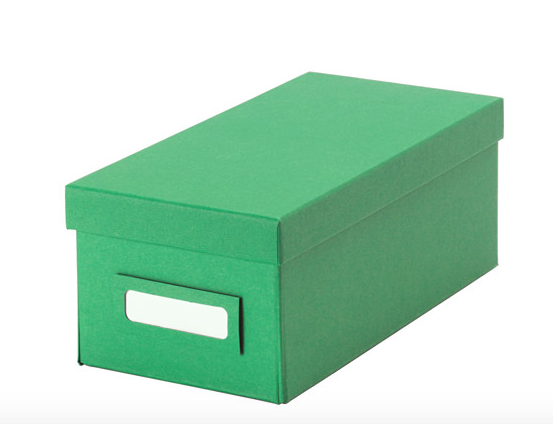
Photo Credit: Ikea USA
No need to add the name plate. You’re going to personalize the box with the alphabet stickers. To add extra security, use your hot glue gun to secure the bottom closure of the box.
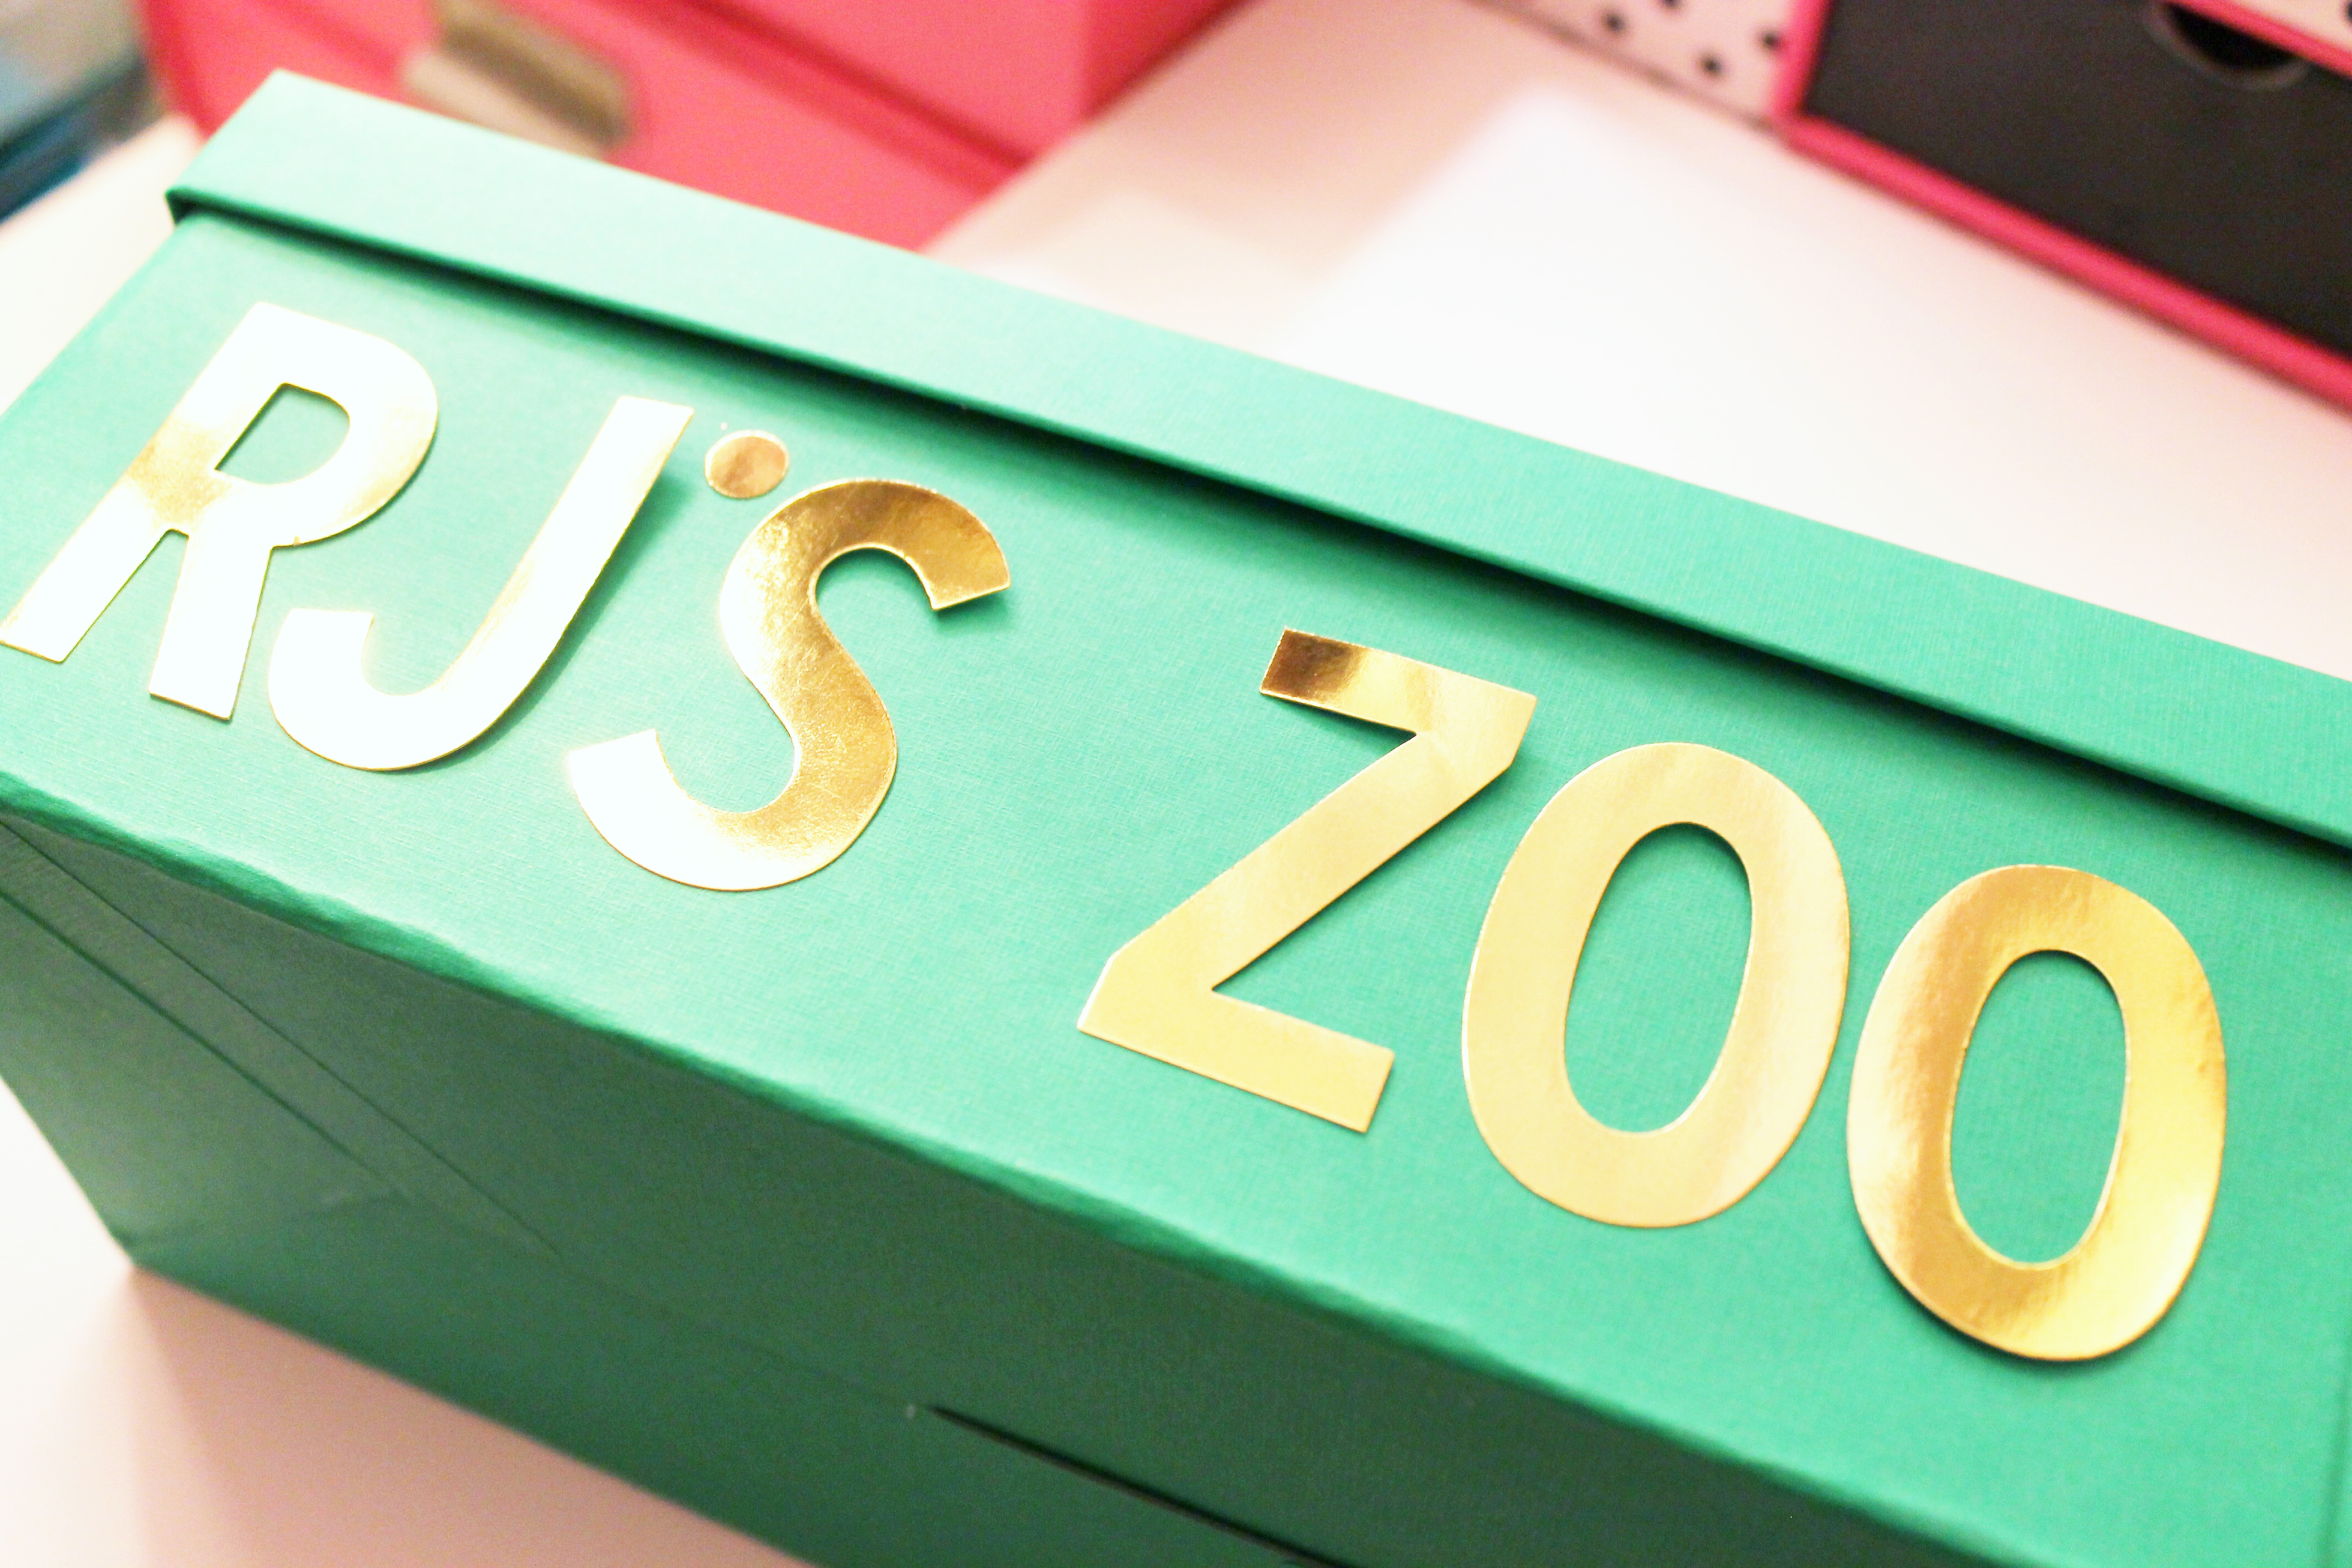
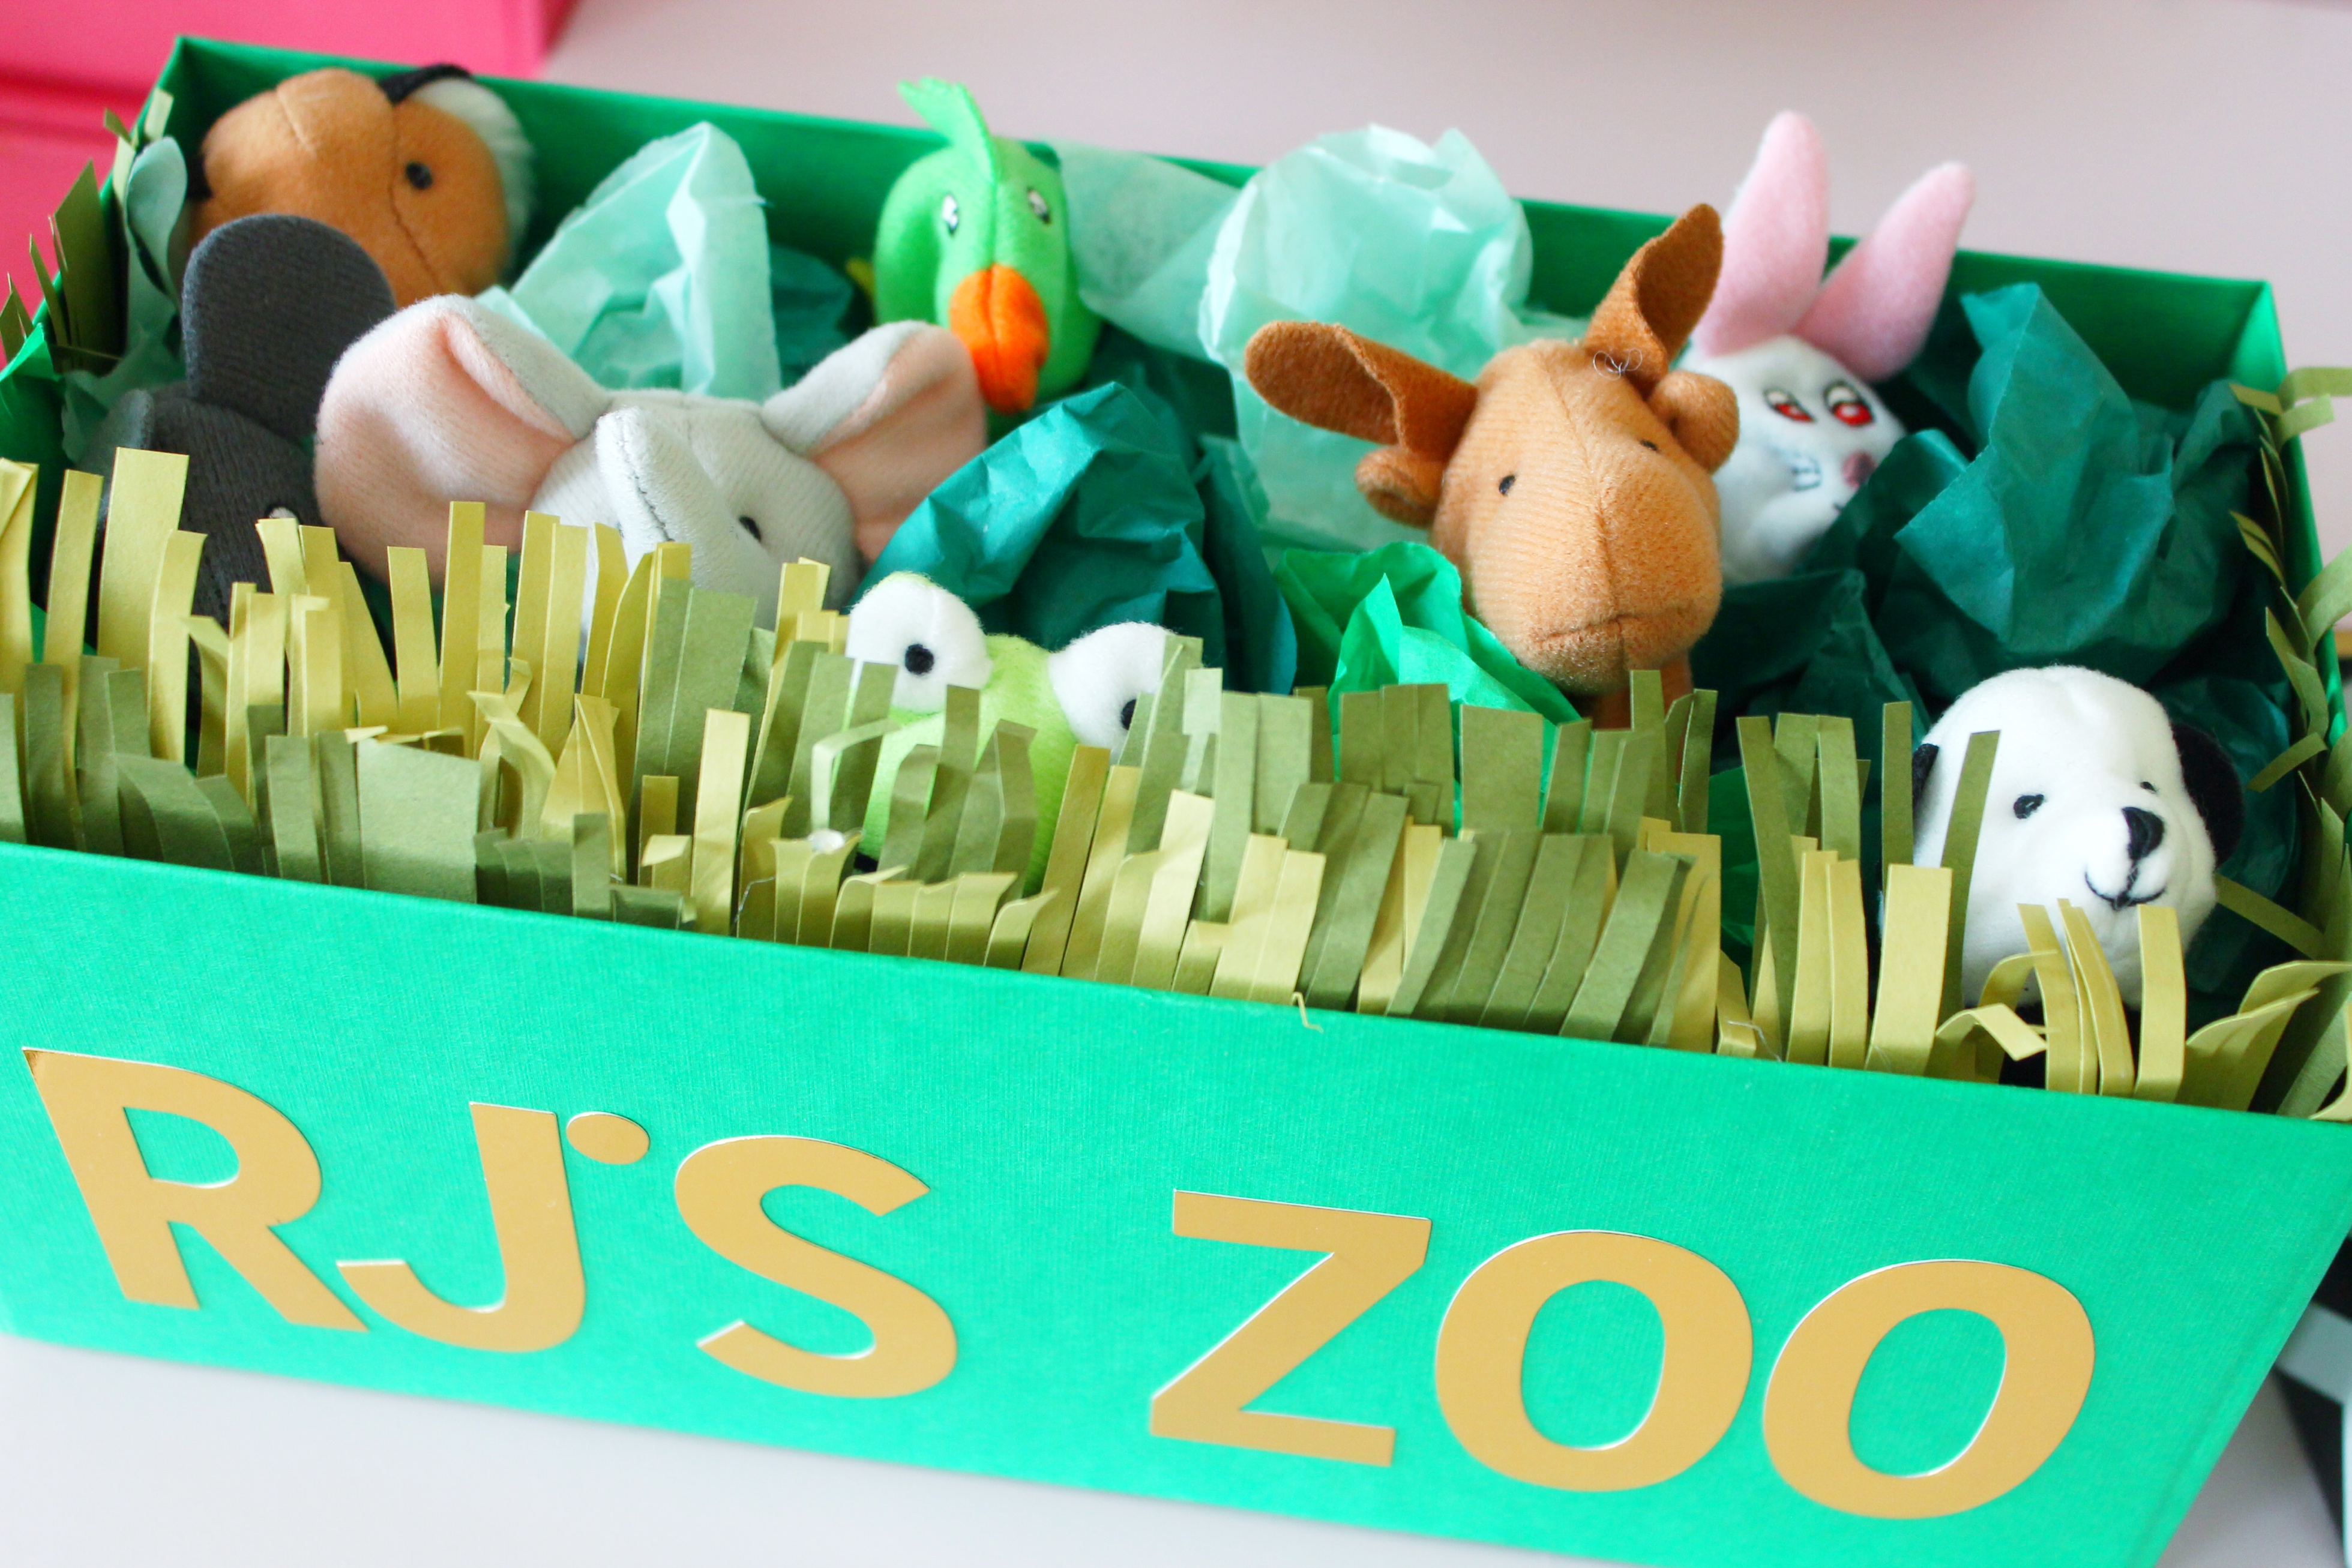
Sept 2: Find the letters needed from your scrapbook alphabet stickers to personalize your personal zoo with the recipient’s name. Place them on one of the long sides of your box.
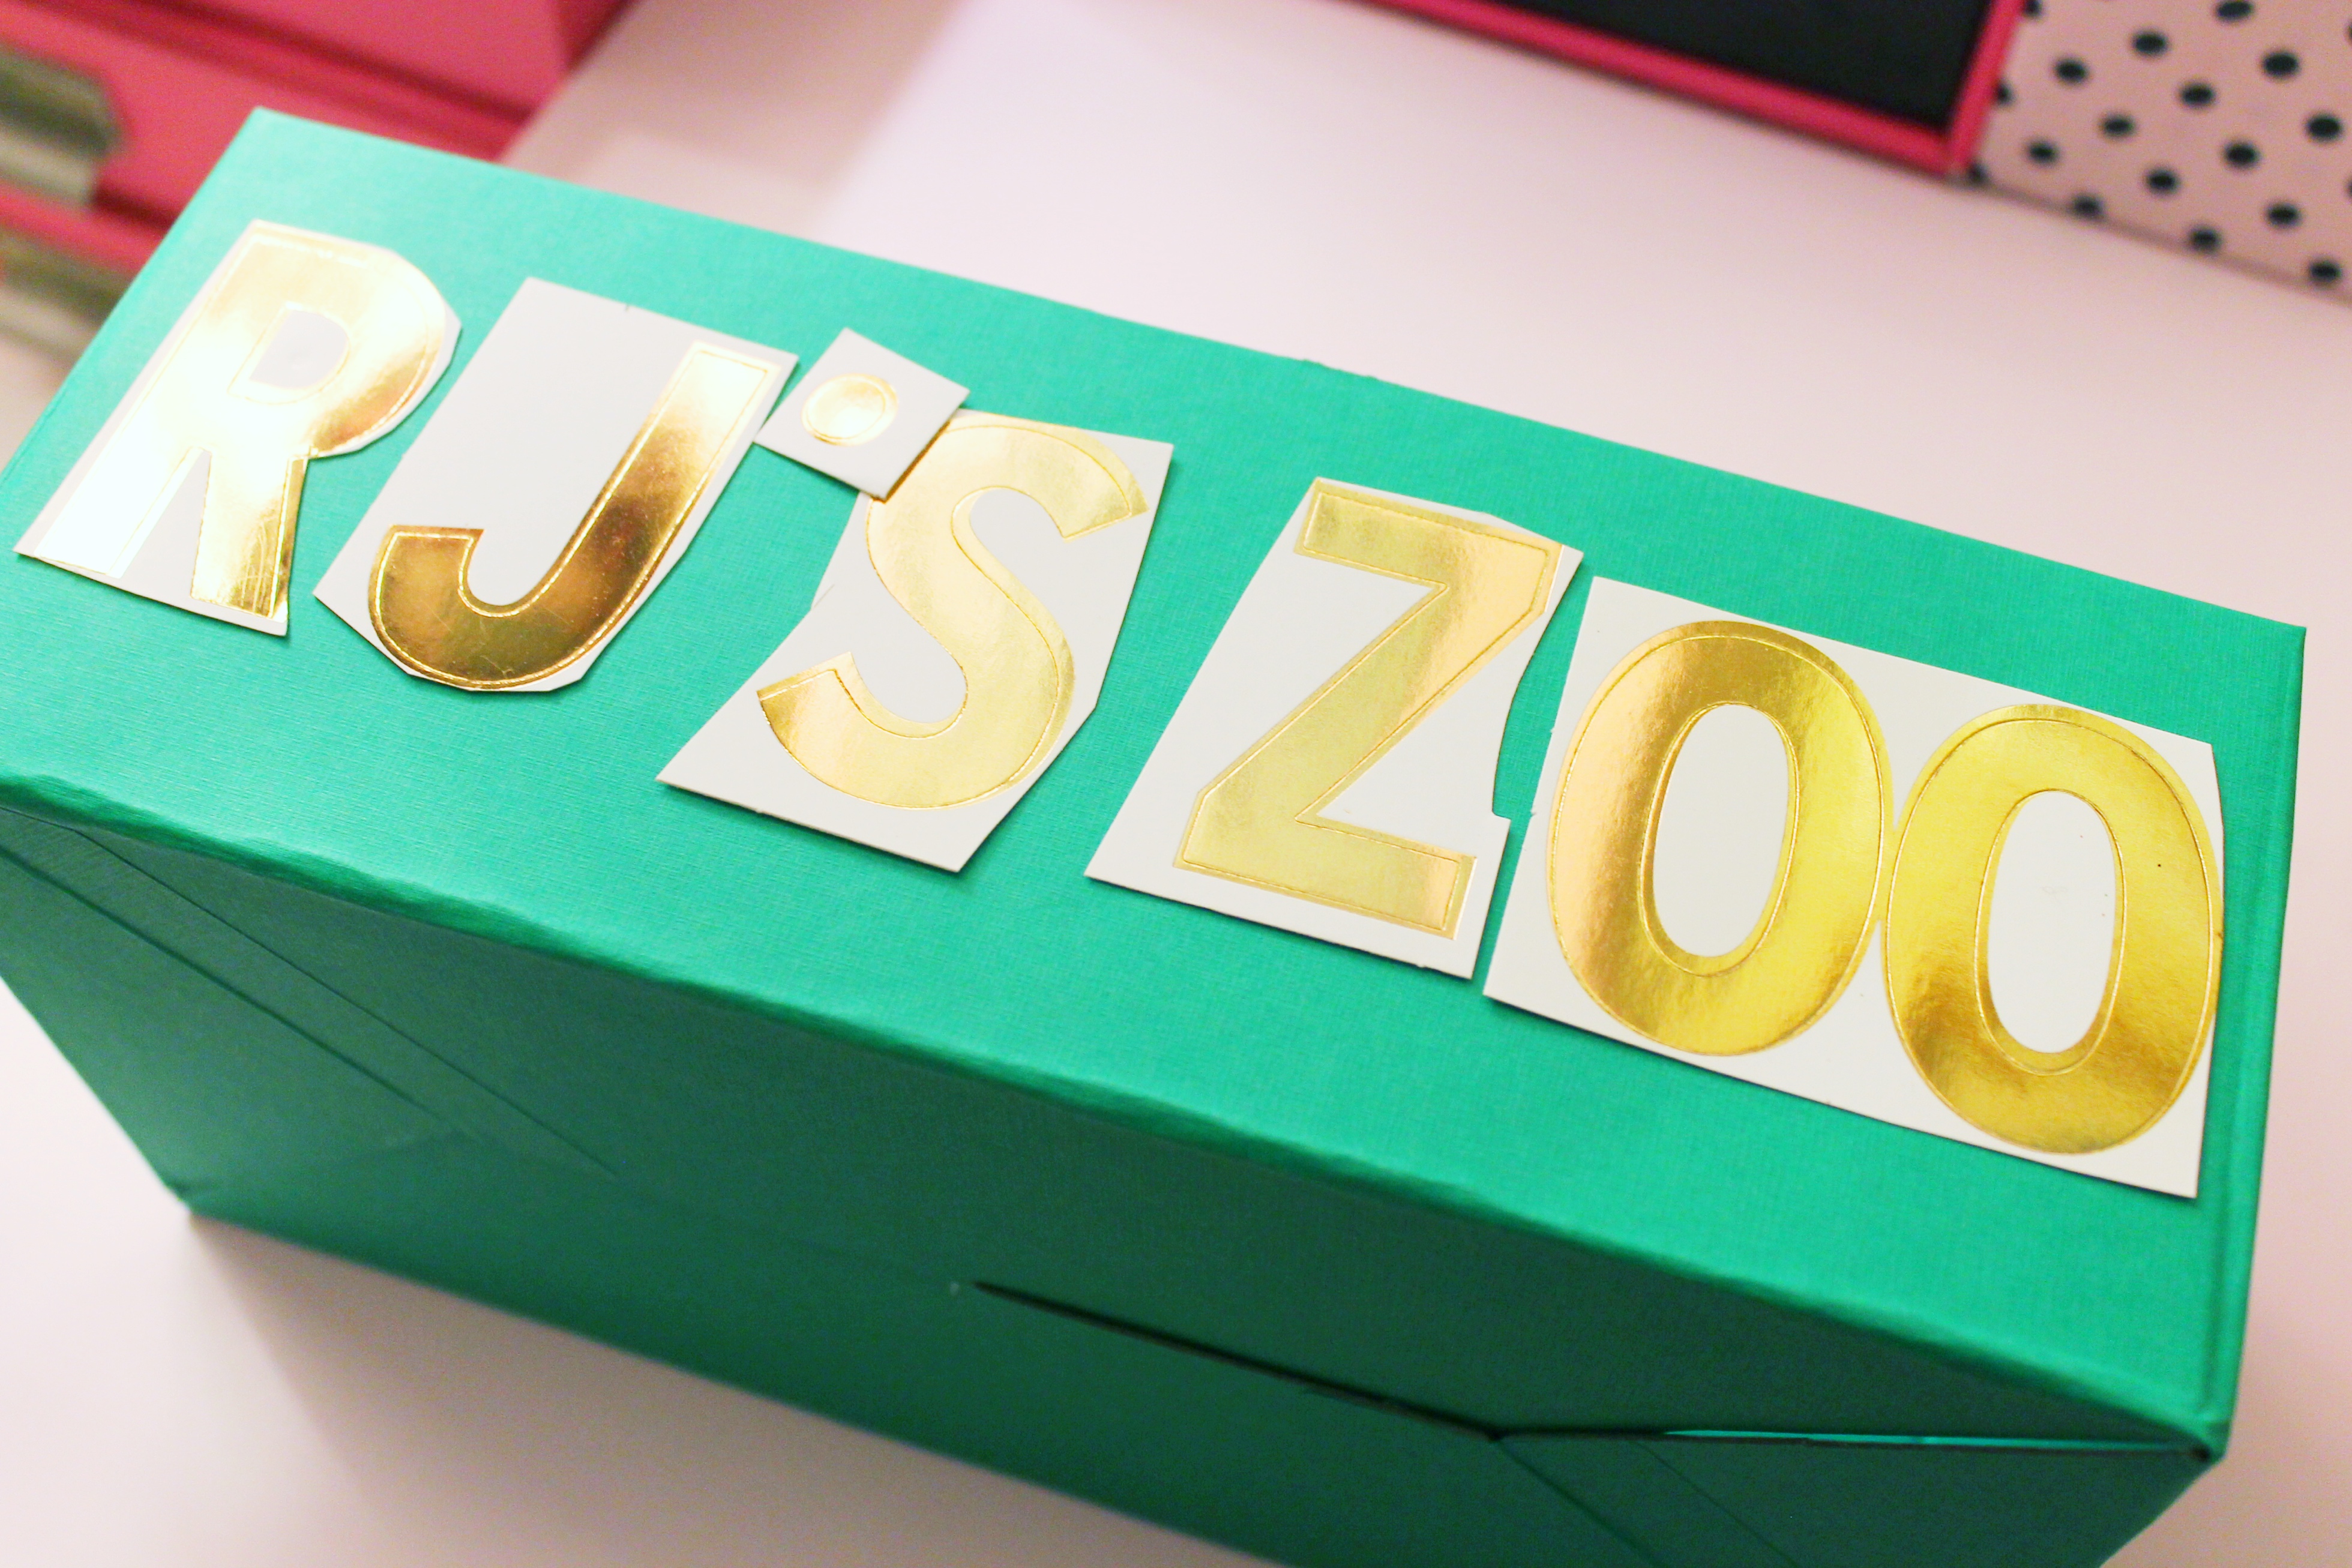 (Because my present was for a sweet little boy who goes by his initial’s, I chose to spell out “RJ’s Zoo” versus using a full name.)
To Create The Grass For Your Personal Zoo
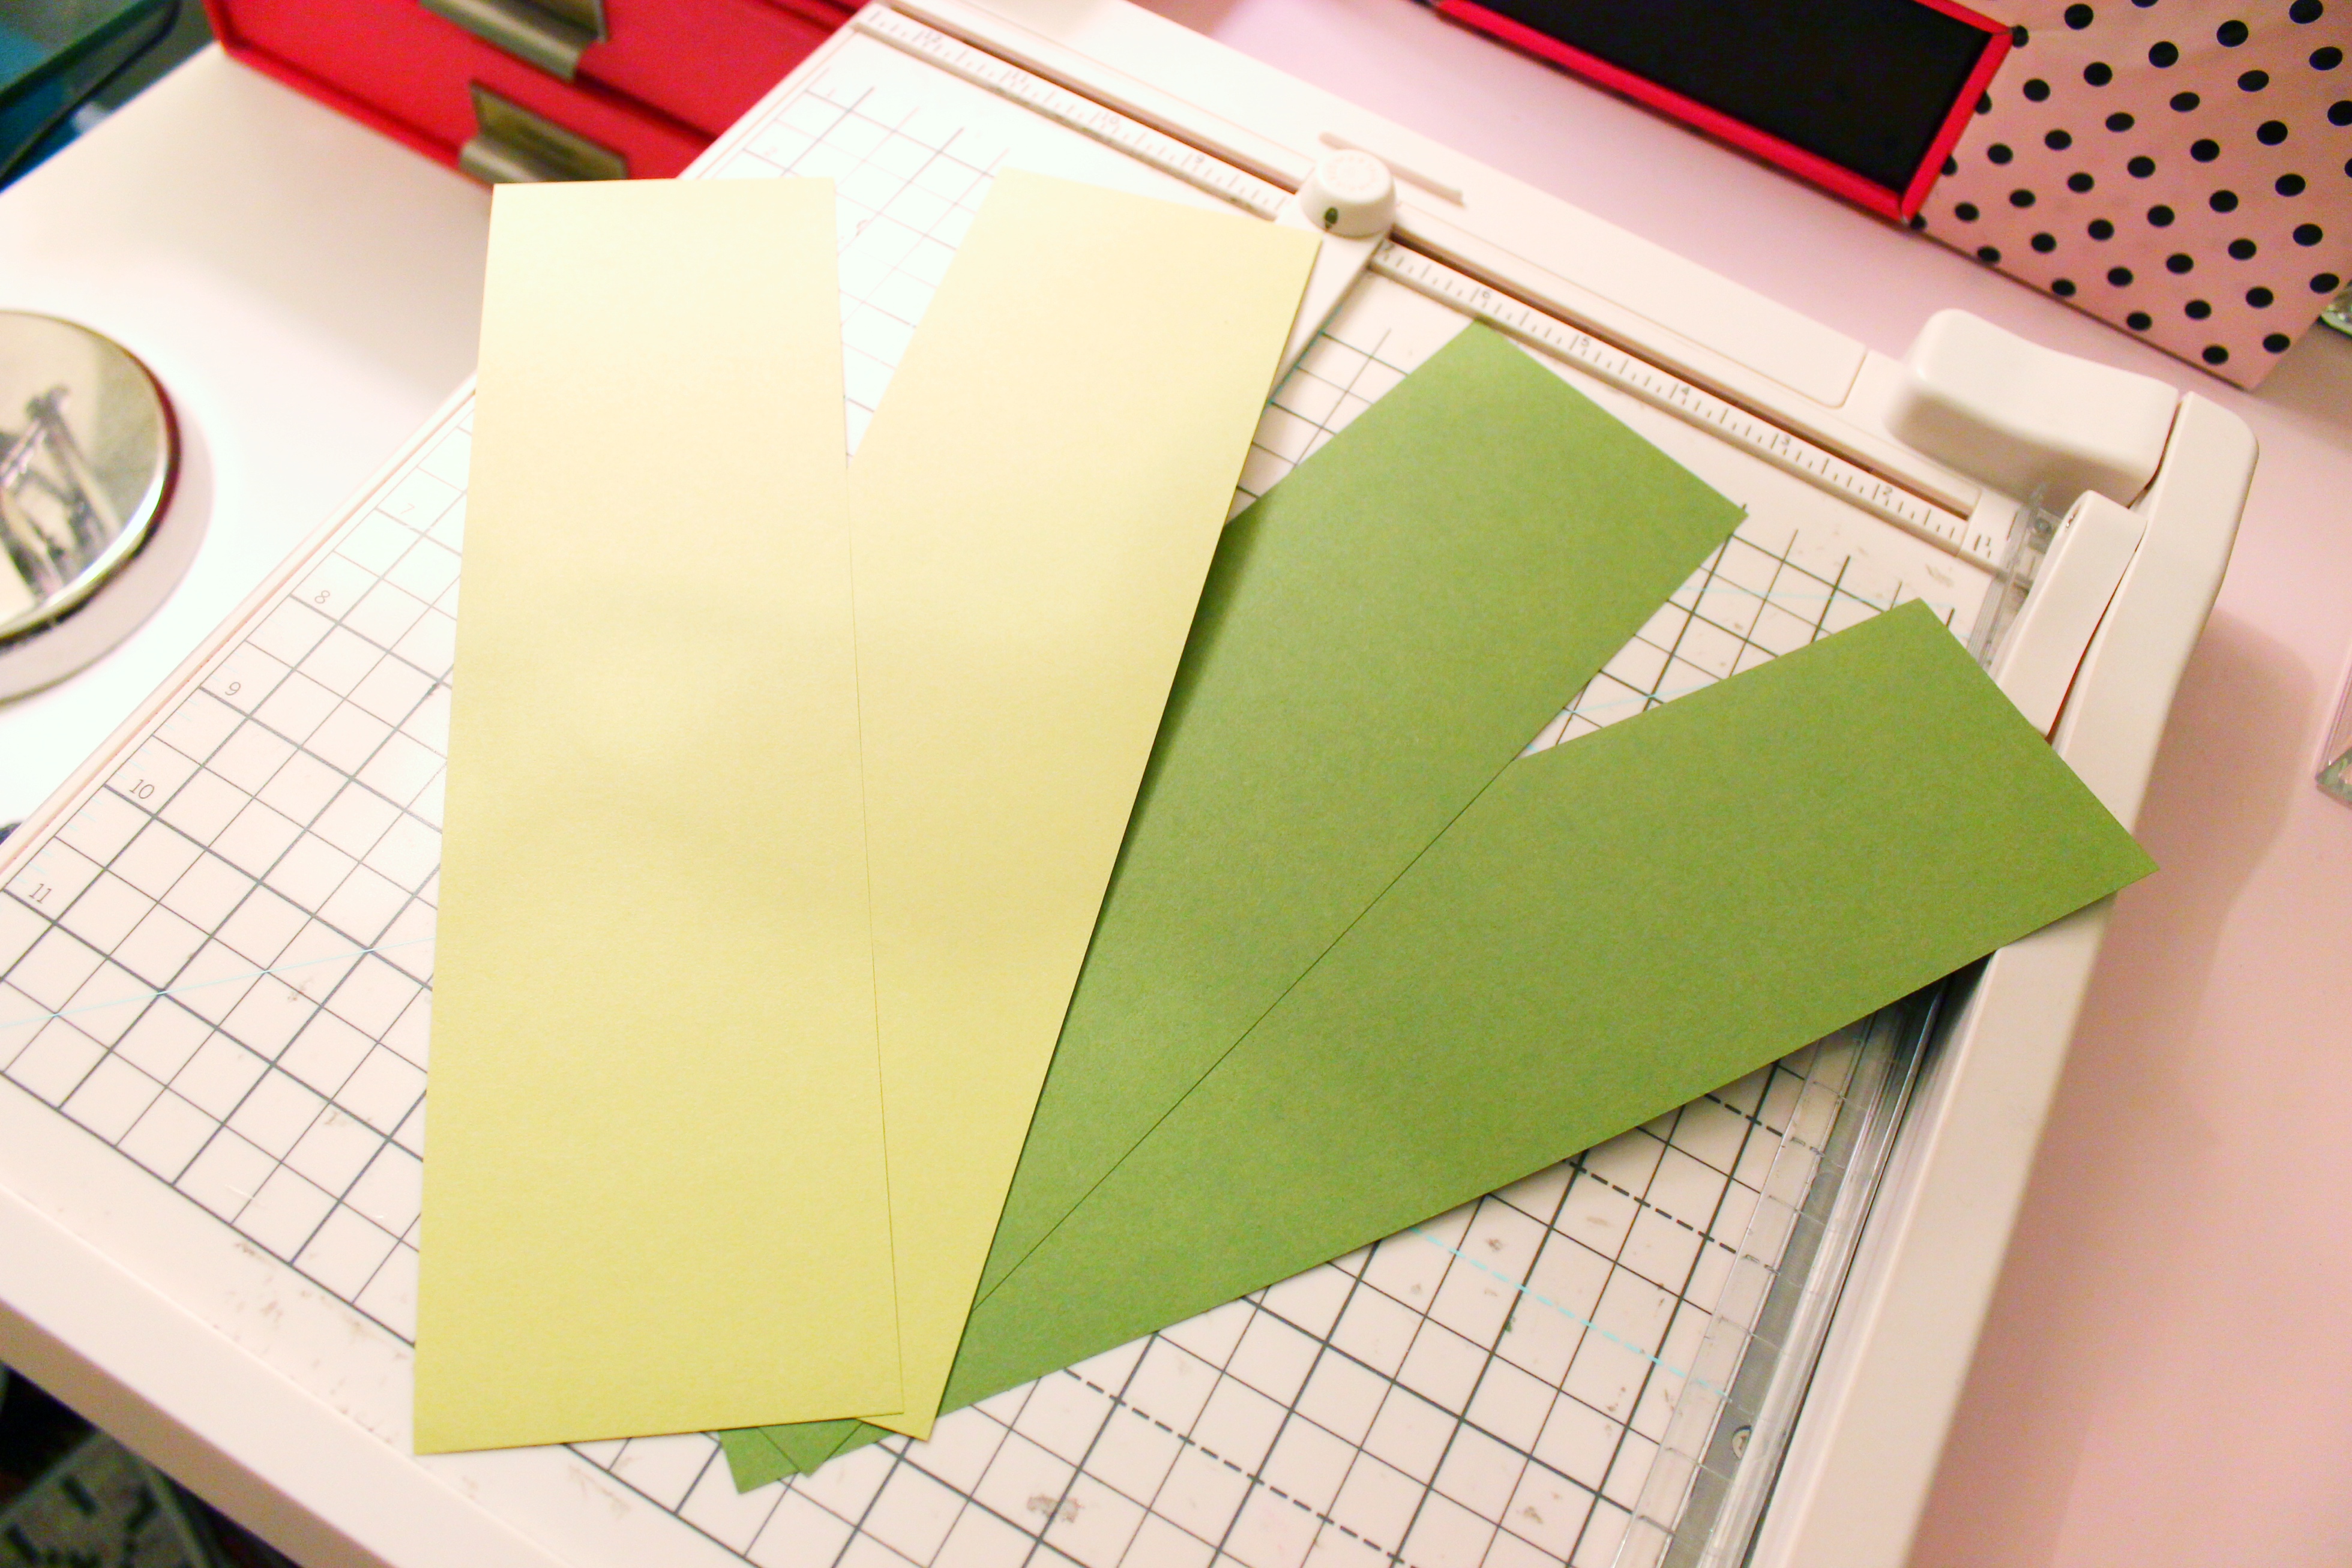
Step 3: Take your chartreuse and moss papers and Paper Trimmer. Cut two 3″ x 11″ pieces of paper from both sheets of paper. You should have 4 strips – 2 chartreuse and 2 moss.
Step 4: Make a mark 2.5 inches from the top of your strips along the long sides. This is your “stop” marker. Using your fringed scissors, cut your “grass” to the stop marker. You need to leave the bottom of the paper strips untouched so you can adhere it to the box.
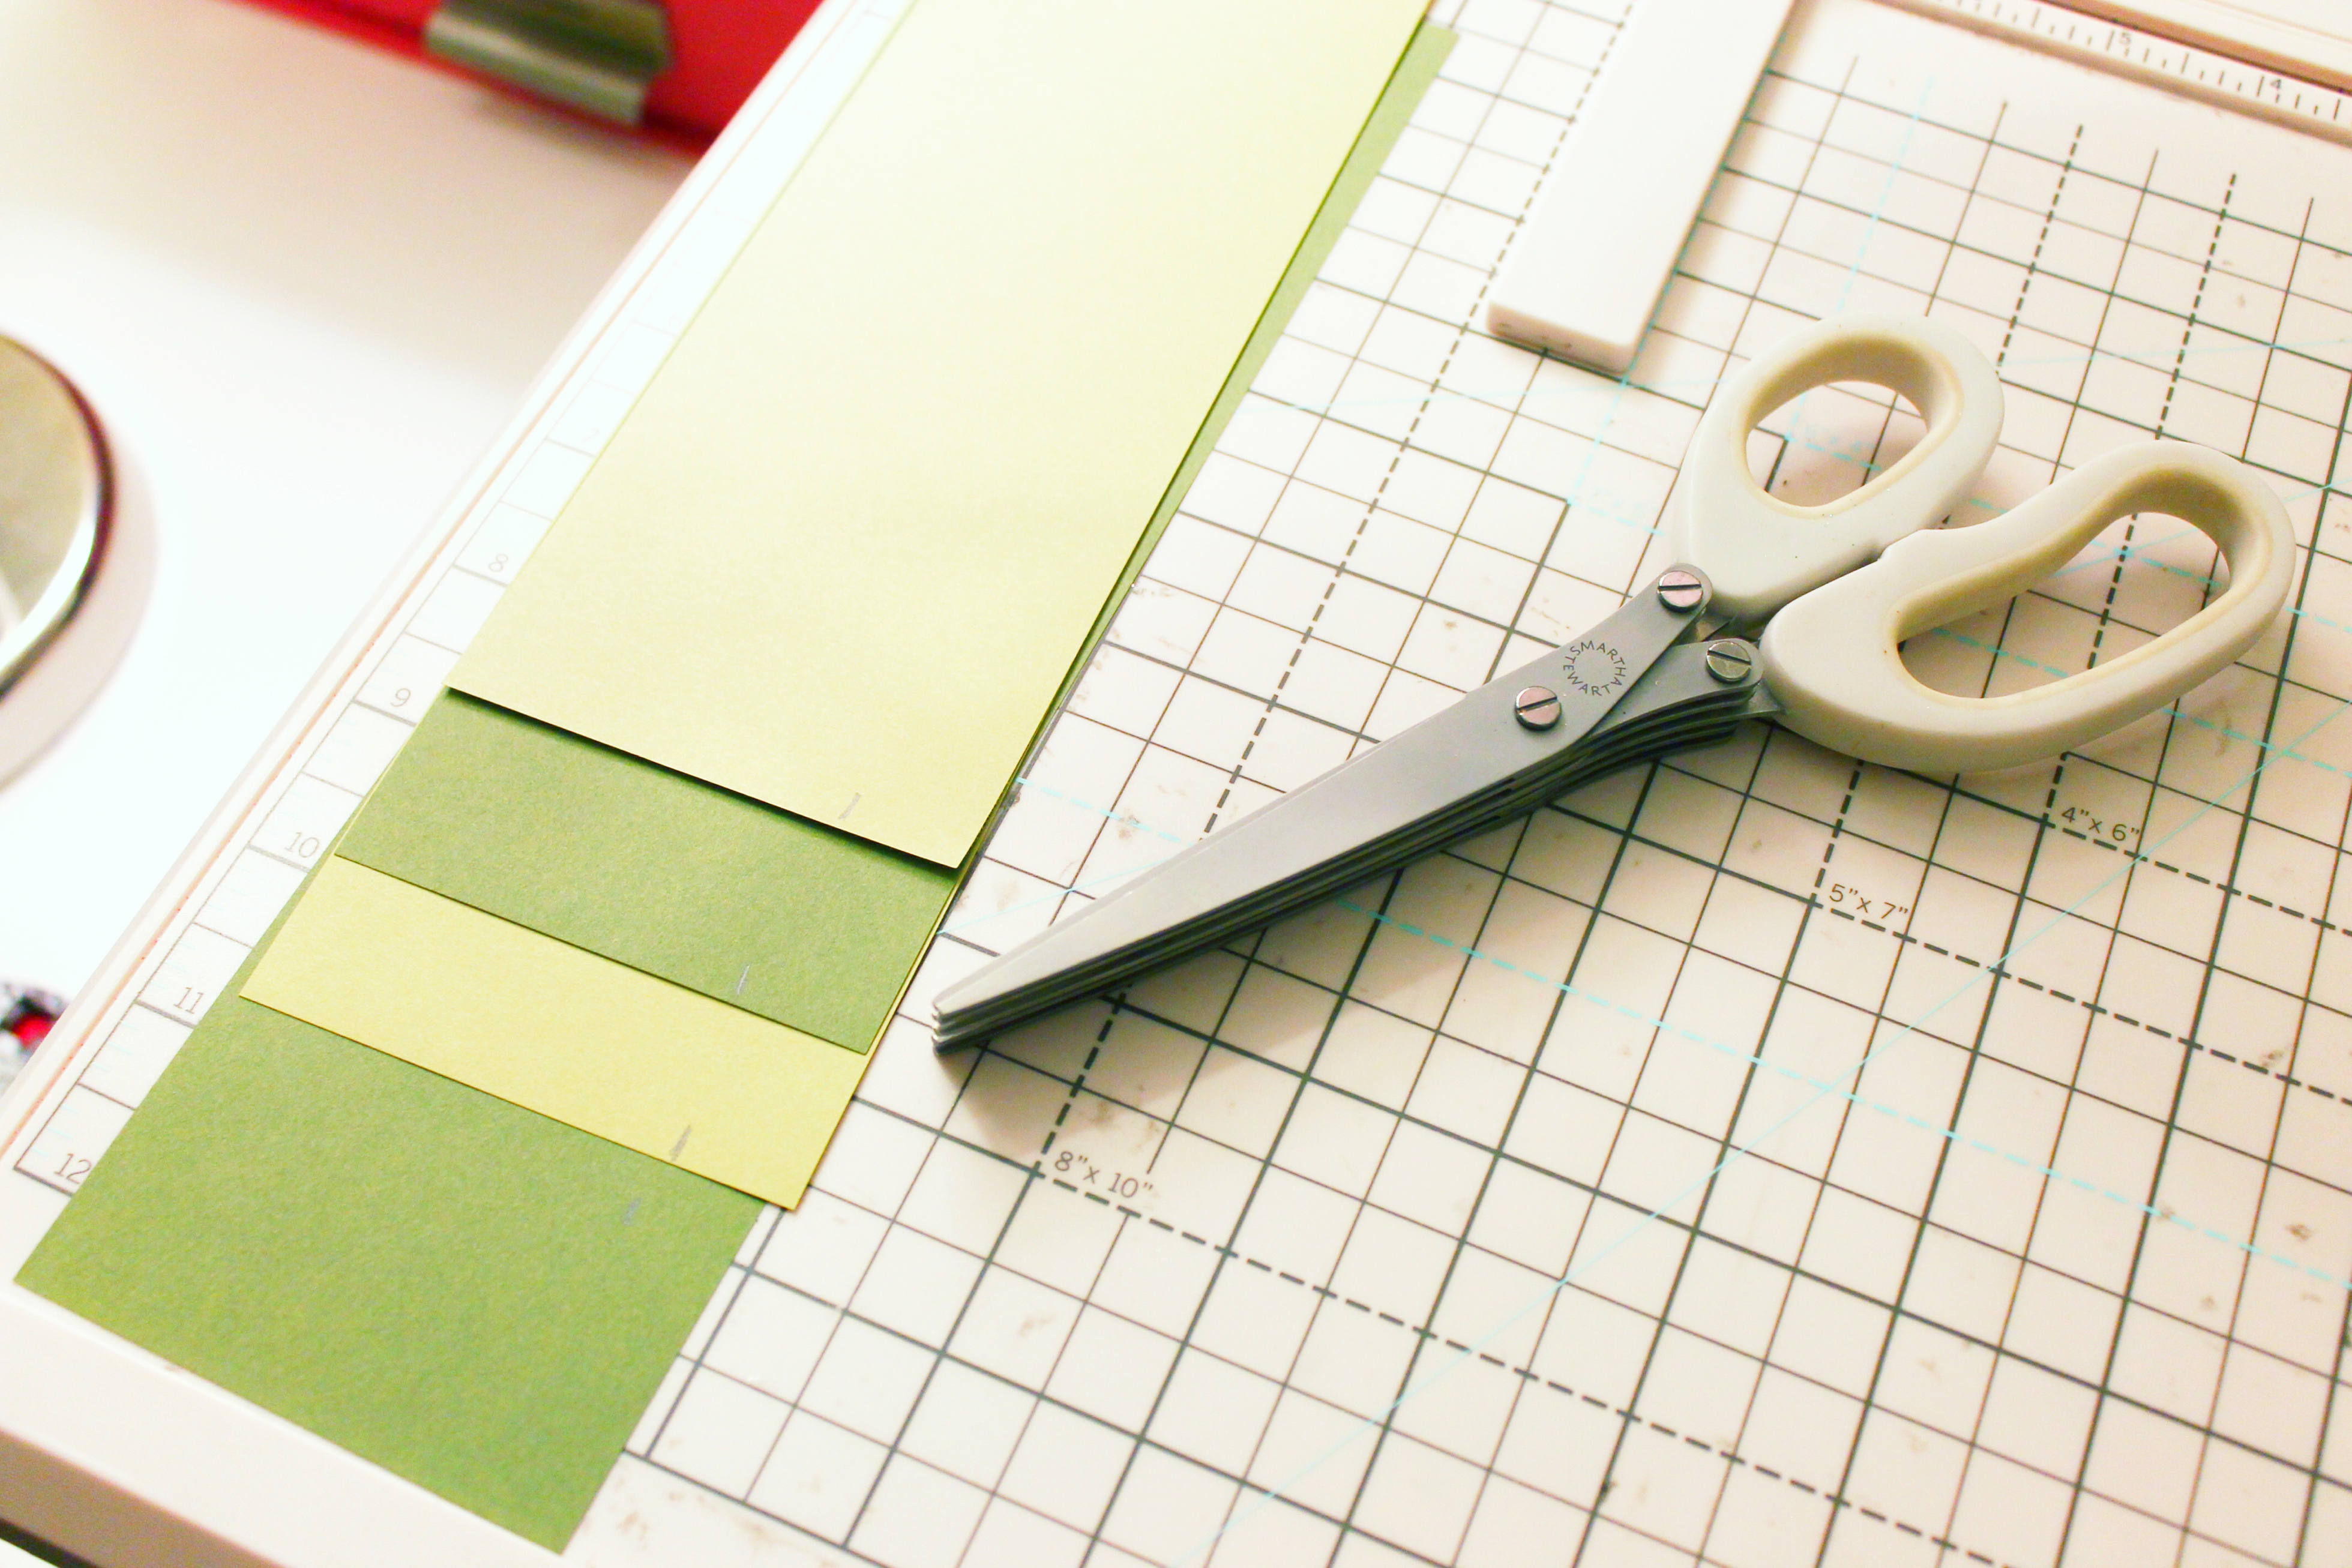
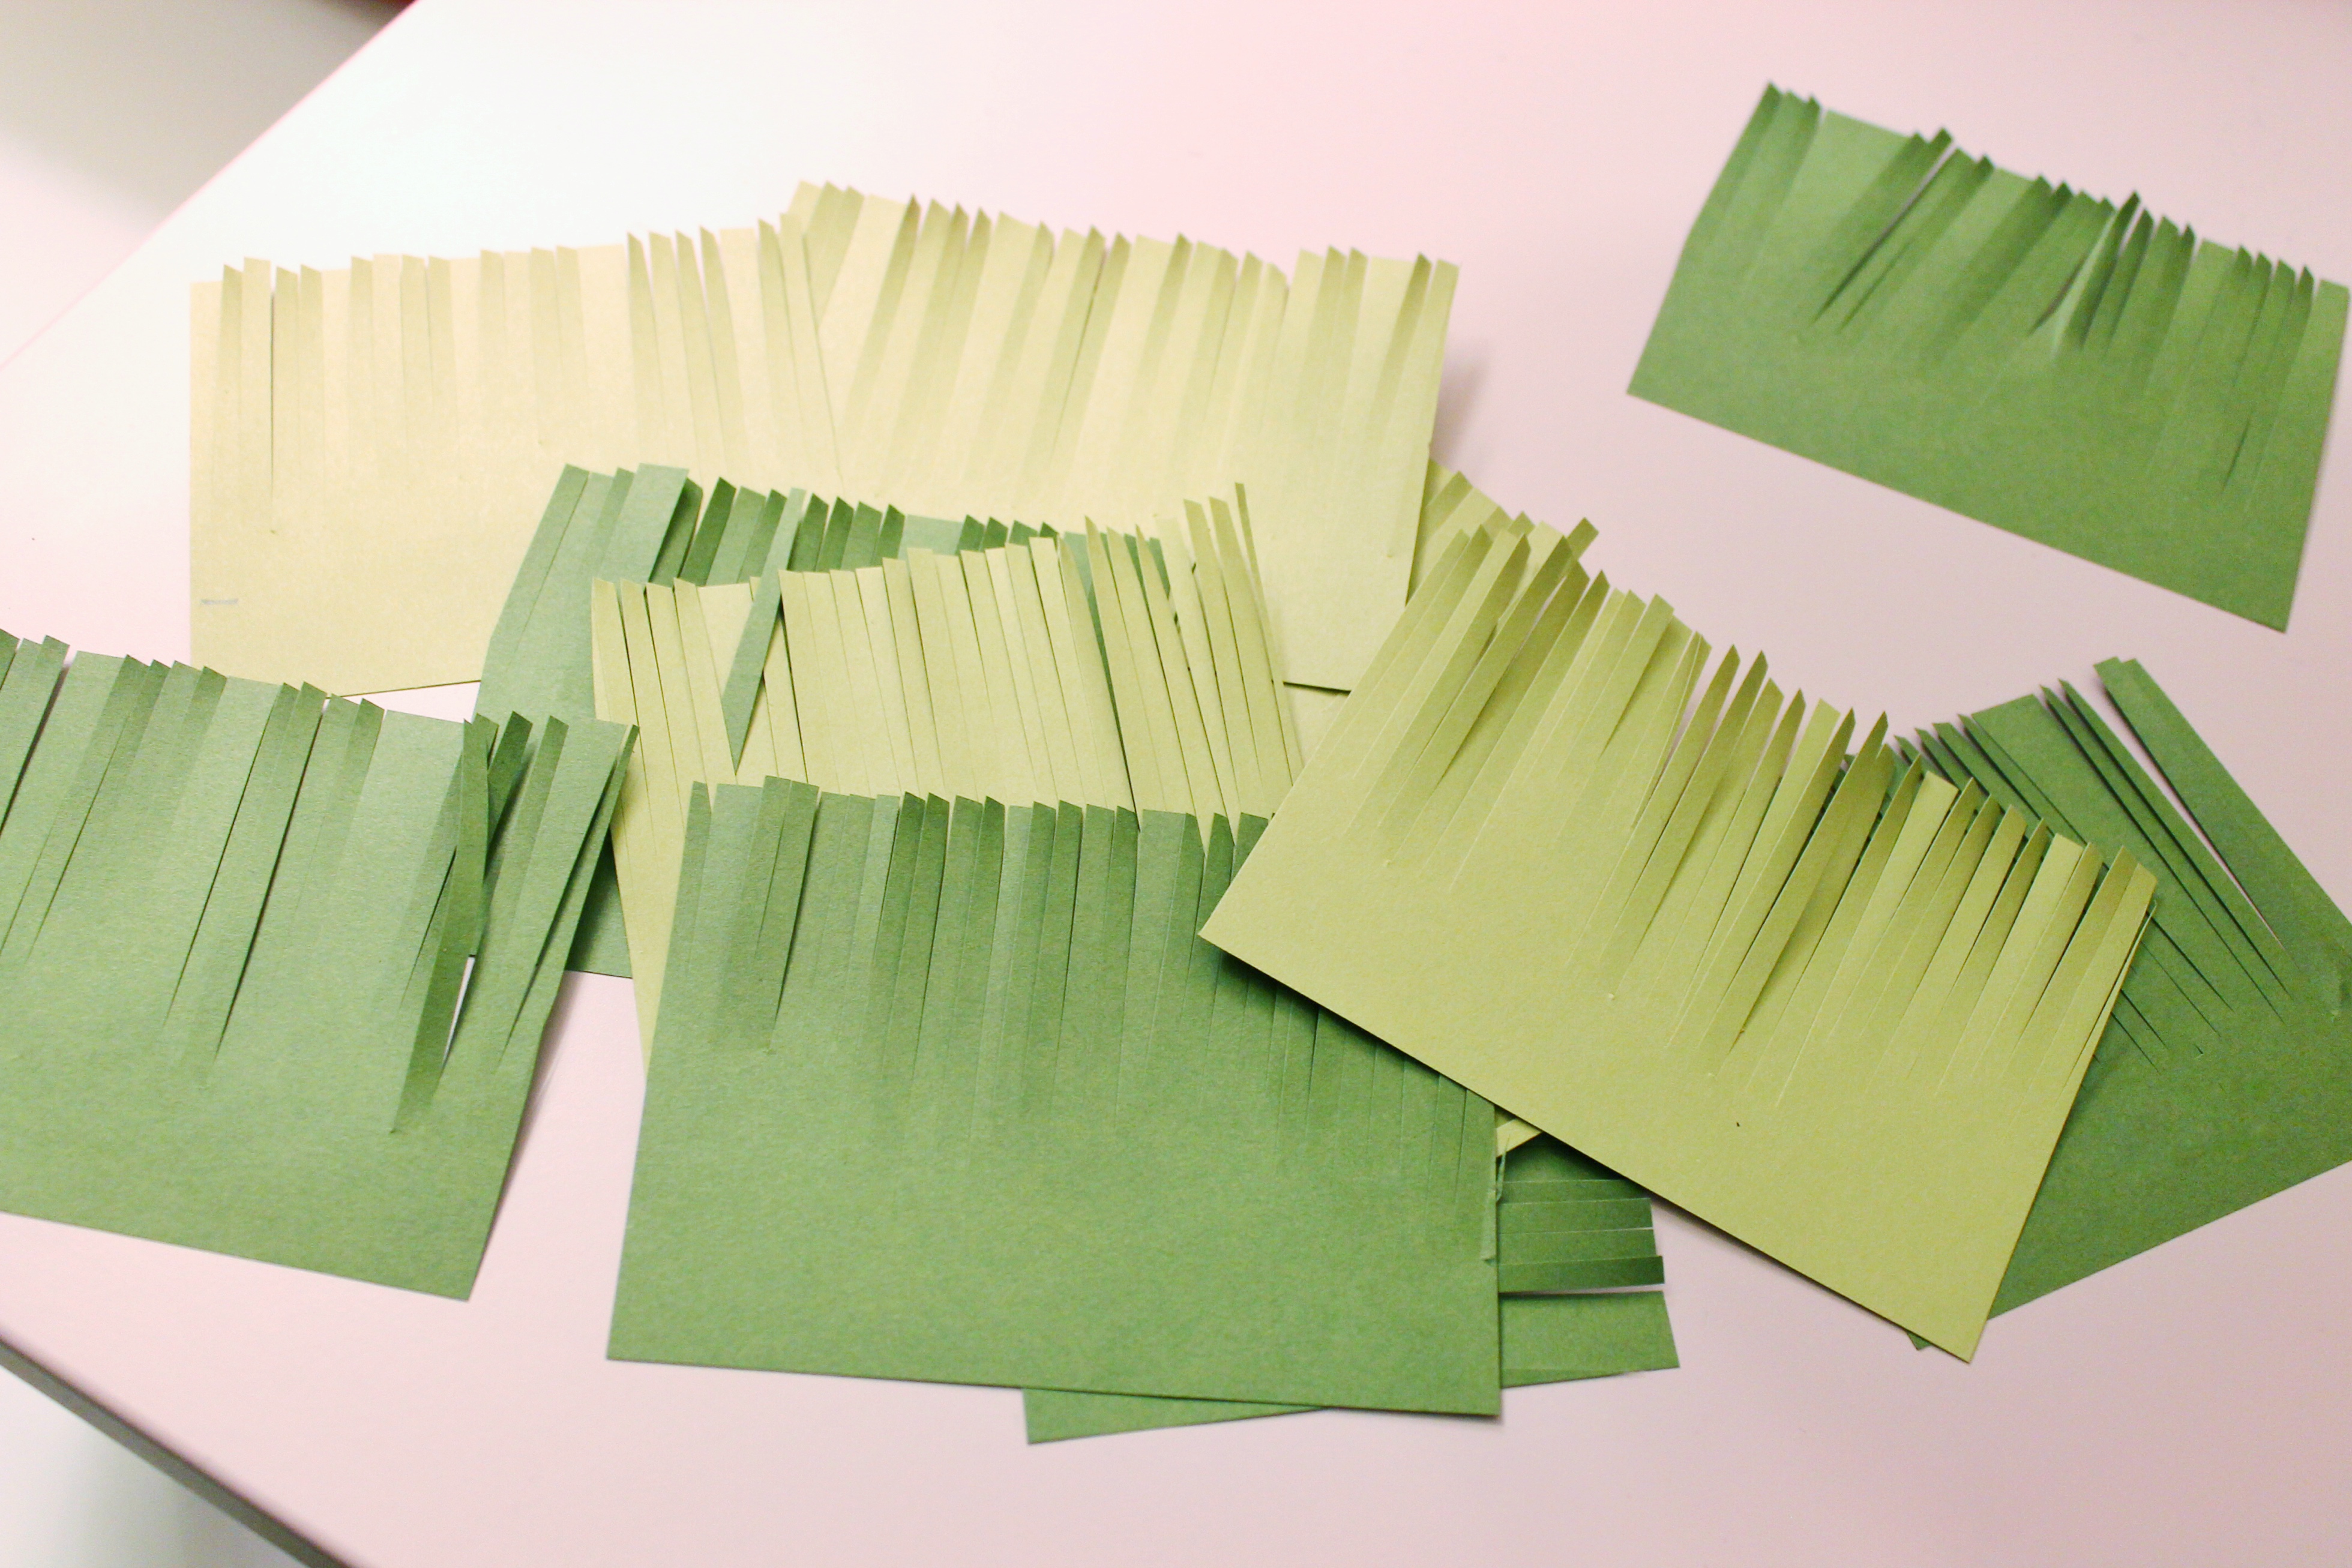
Step 5: Cut your strips again – this time in 3.5″ x 2.5″ sections. You should have about 12 sections of grass.
 Begin to glue your grass sections along the inside of the box on the side where you added the recipient’s name. Layer and stagger your pieces along the inside of the box.
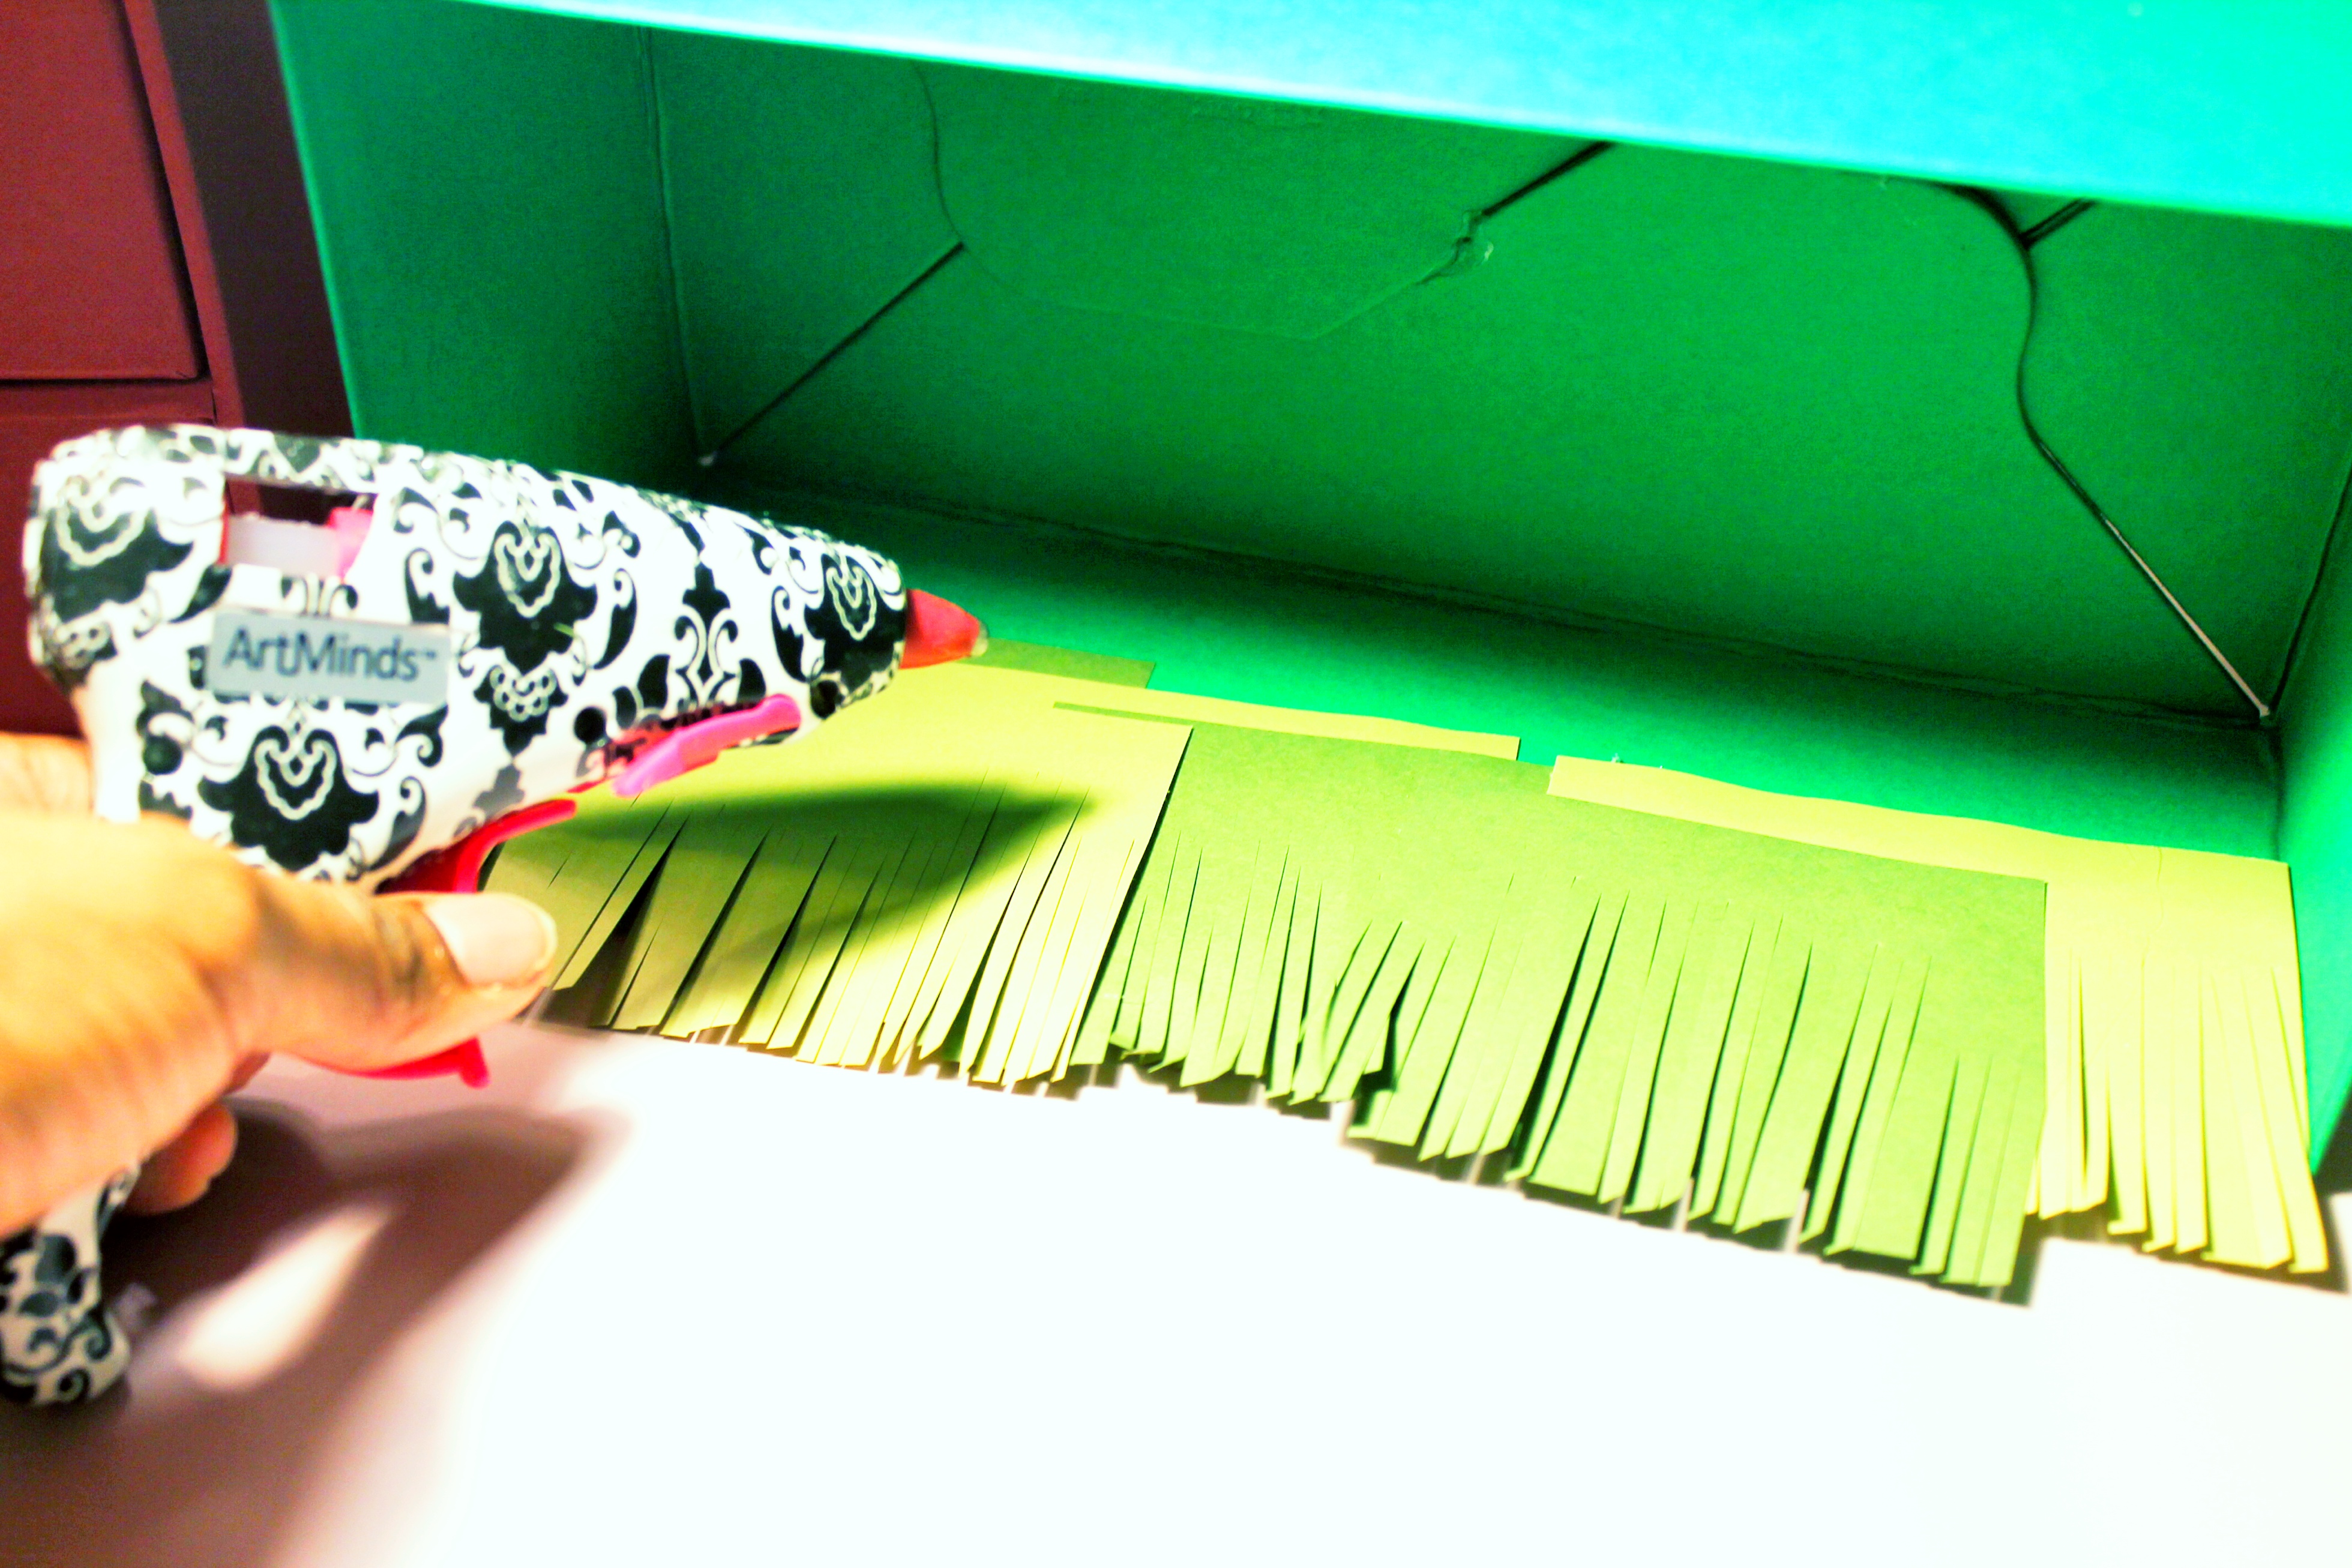 Also, alternate your colors as you layer and stagger them. Make sure you don’t place your grass too high because you’ll need to place the lid on the box. (Your grass will bend backward, but that’s okay. It will give your grass a more “authentic” look.)
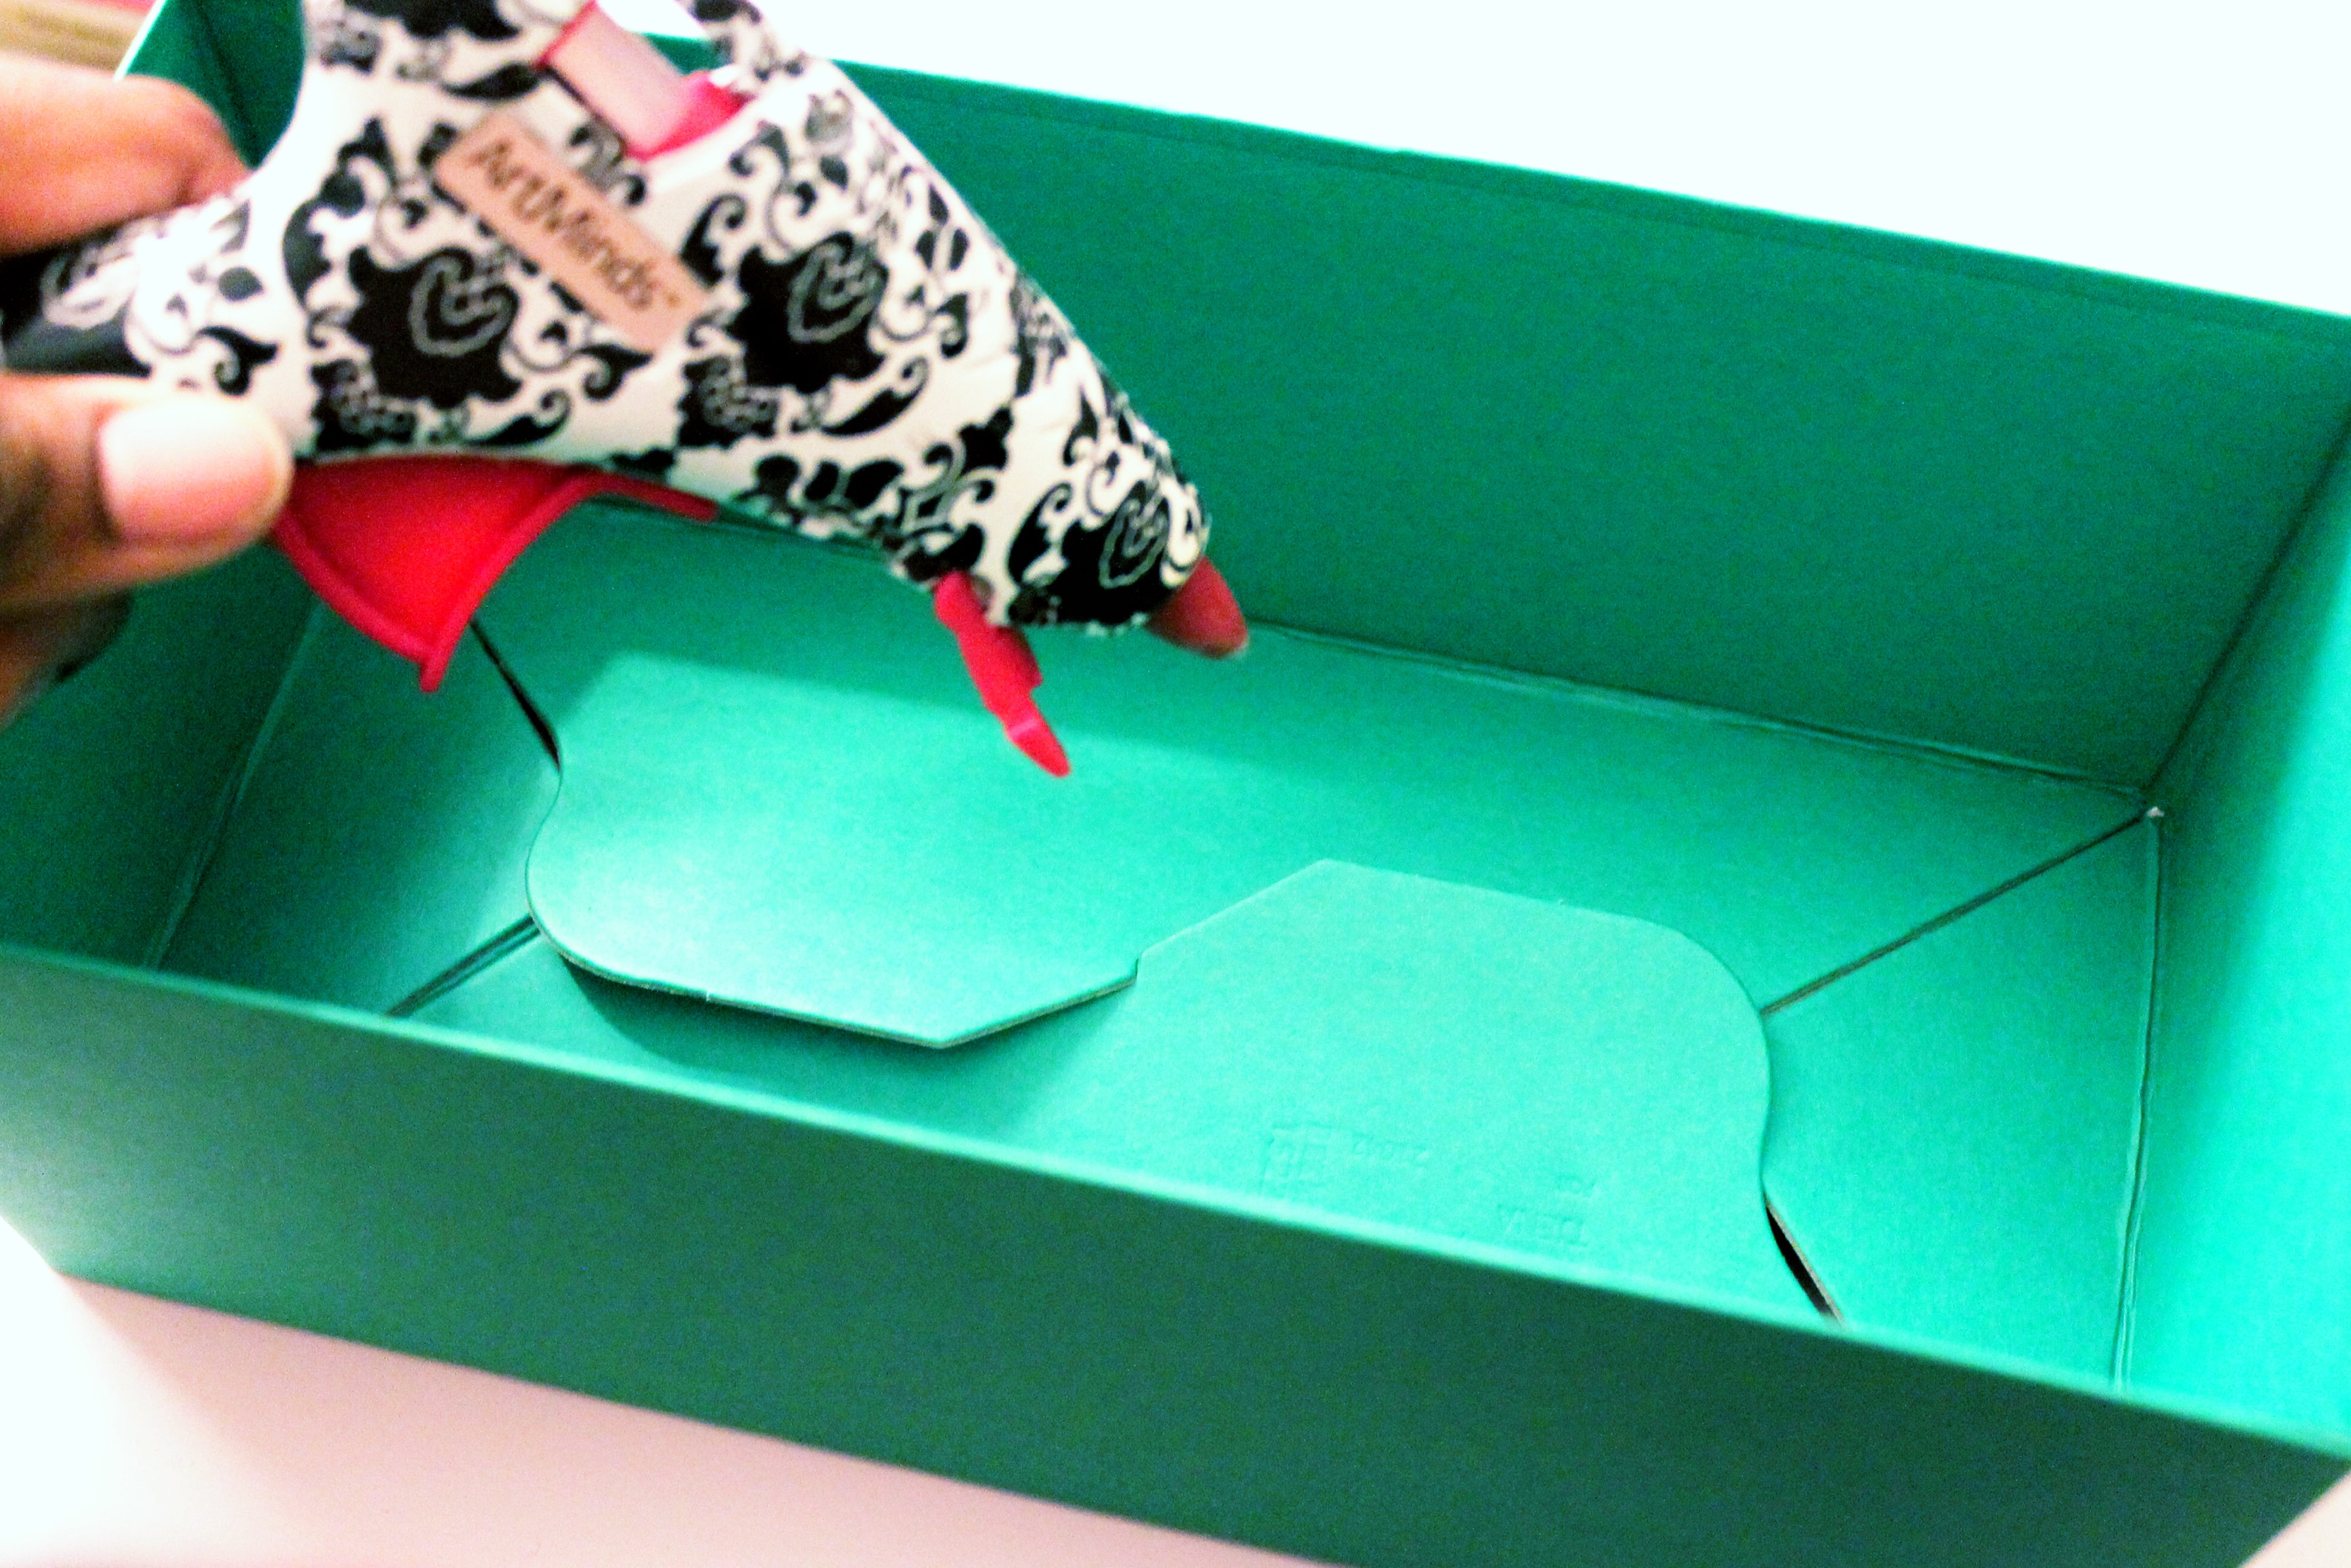
Step 6: To add depth to your grass, take some green tissue paper and scrunch it up. Begin adding it to your box. You can pack as little or as much as you like.
To Finish Off Your Personal Zoo – Add Animals
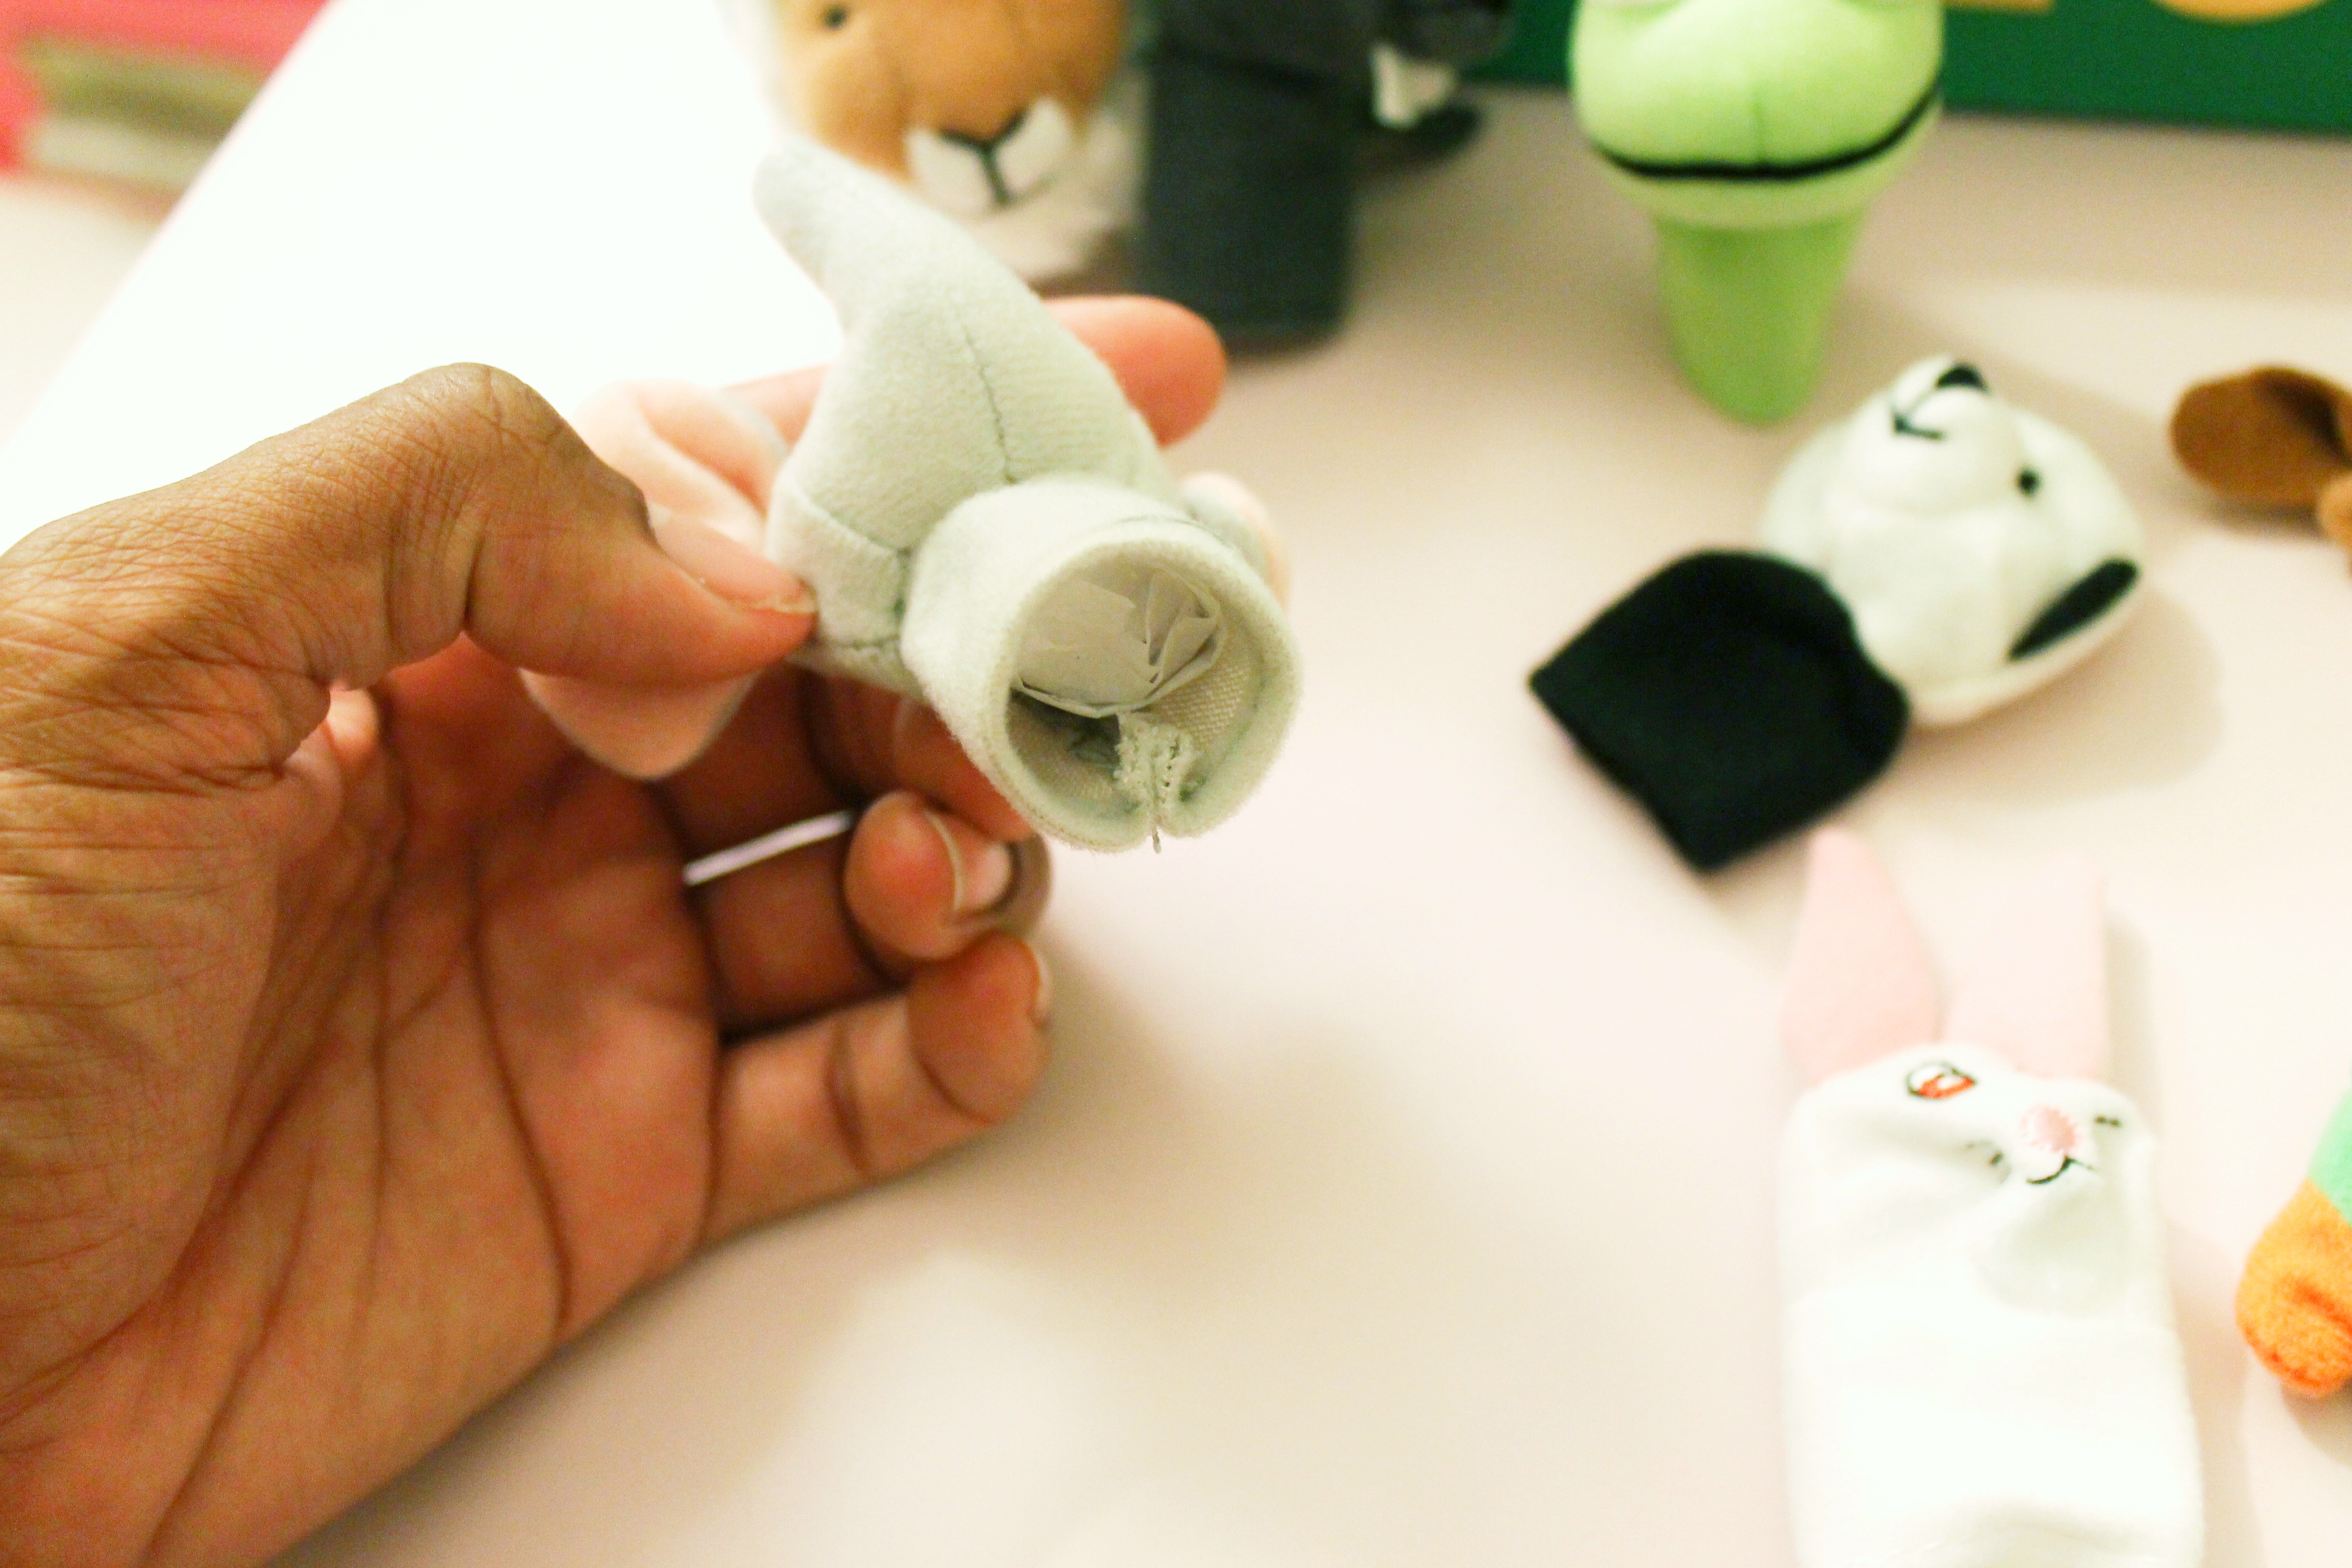
Step 7: For presentation purposes, add a bit of tissue paper to each of your finger puppets. This will help them stand up on their own.
 Once you stuff your puppets, add them to the tissue paper grass. Note: Feel free to use all 10 puppets, but some of the animals included in the package don’t REALLY live in the grass in a zoo (i.e. the shark and sea turtles.) Depending on how accurate you want to be, feel free to leave some of the non-grass zoo animals out of the box.
Enjoy Your Personal Zoo With A Little One
That’s it. All you have to do now is add a sweet little birthday note, wrap up your box and voila! You can give the gift of safe, wild animal entertainment. Ha!
 So how did your personal zoo turn out? Was it Grrrrreat!? ( = Post your pics to Facebook, Instagram or Twitter with #htgawcrafting. I can’t wait to see how they turned out.